Release 34 Notes 02 October 2022#
Summary#
In this release, we’ve developed the following new features and improvements that let you do the following:
Add fatigue factors that let the labor module calculate more accurate labor performance data.
Use more operators when setting up attribute mappings or mapping a matrix to a time component.
Copy Time Components.
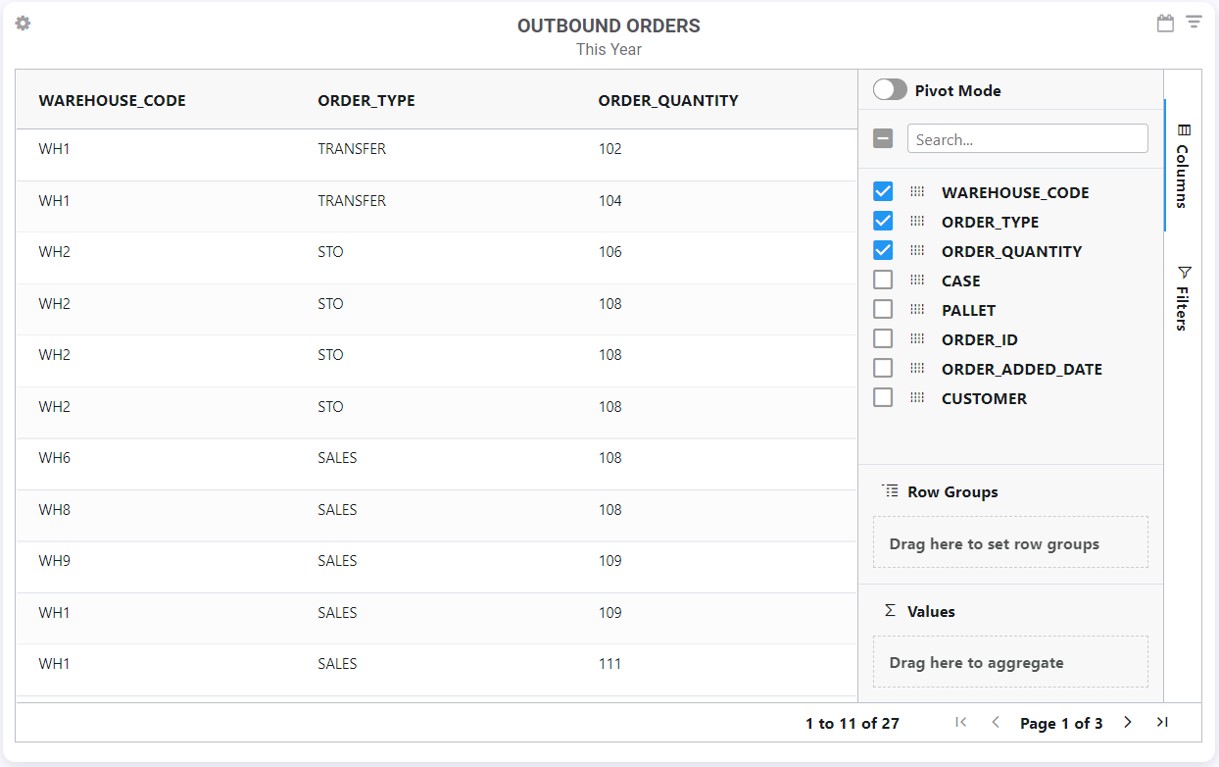
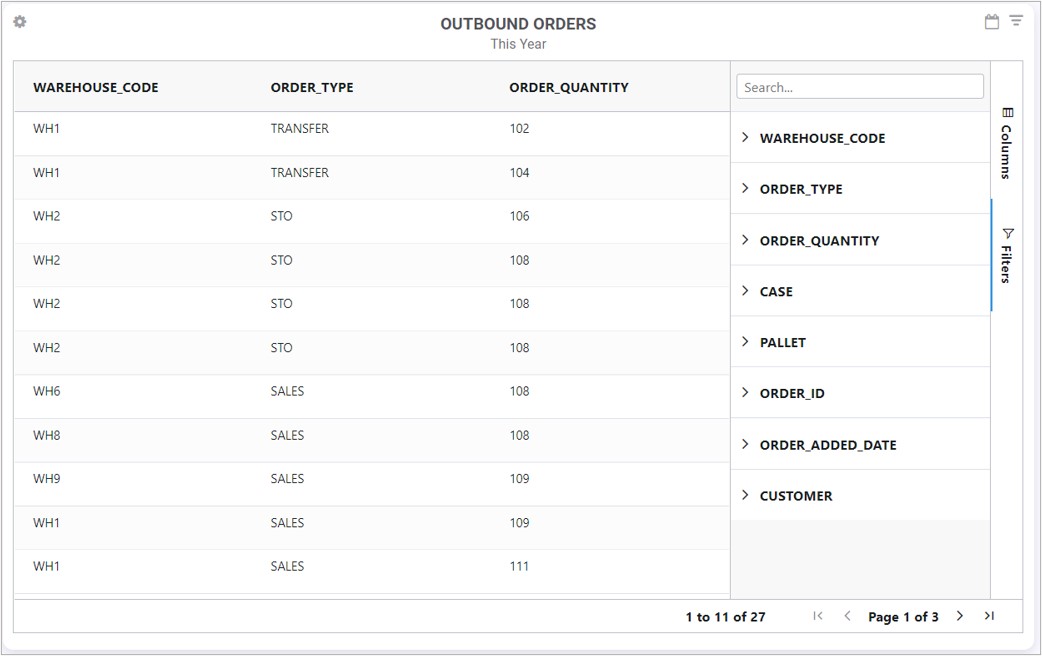
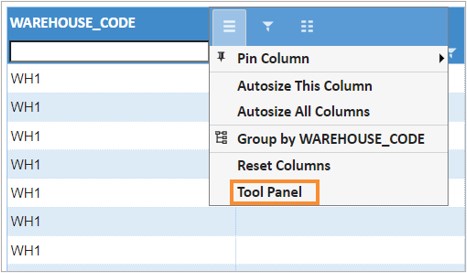
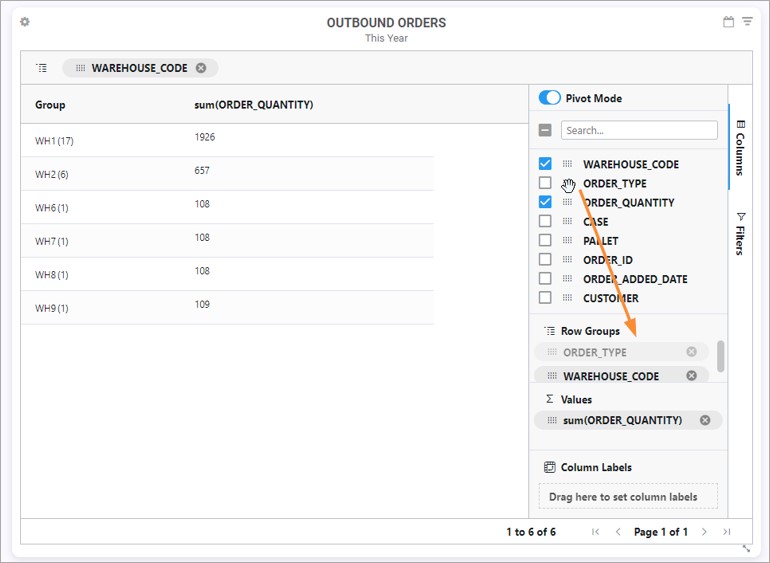
More easily filter and drag columns on grid widgets in Pivot Mode.
New Features - Labor Module#
Add Fatigue Factors for more Accurate Labor Performance Data#
You can now add up to 24 fatigue factors so that Rebus applies the right fatigue factor to calculate the appropriate fatigue allowance and capture more accurate labor performance data.
Previously, you could specify only one fatigue factor. This initial fatigue factor is now the Default Fatigue Factor.
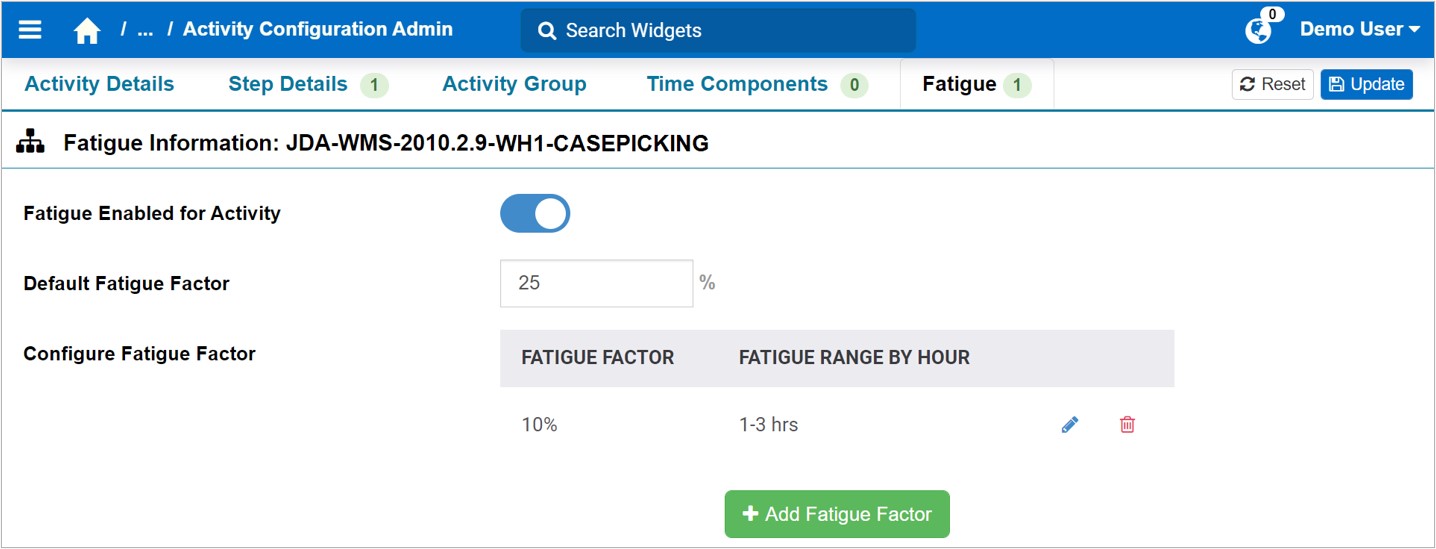
How Added Fatigue Factors Work#
For each added fatigue factor, add a fatigue range (i.e., the range of hours worked). When an imported transaction is turned into an activity, Rebus applies the right fatigue factor based on the fatigue range to calculate the fatigue allowance.
Here’s an example of how Rebus applies the right fatigue factor based on the fatigue range to calculate the fatigue allowance.
Sequence |
Rebus Processing Notes |
|---|---|
1 |
The PICK activity’s goal time is 2000 seconds. |
2 |
Default Fatigue Factor for the PICK activity type is 25%. |
3 |
Another Fatigue Factor is added:
|
4 |
Labor User’s PICK transaction is imported and carries the following information:
|
5 |
Rebus calculates the fatigue range for the PICK activity: Fatigue range = PICK’s Min_Stop_Date_Local — Shift Start Time = 10:00 AM – 8:00 AM = 2 hours |
6 |
The fatigue range for the PICK activity (2 hours) falls within the fatigue factor’s fatigue range (i.e., greater than 1 hour and less than 3 hours). |
7 |
Rebus applies the 10% fatigue factor to calculate the fatigue allowance and adds it to the activity’s total goal time. |
8 |
The PICK activity’s total goal time = Fatigue allowance + goal time = (Fatigue Factor * goal time) + goal time = 0.10*2000 + 2000 = 2200 seconds |
If a fatigue range for an activity does not fall within the added fatigue factor’s fatigue range, the Default Fatigue Factor will be applied to calculate the activity’s fatigue allowance.
Note
 For essential activities created from the Activity Adjustment Admin screen, the Default Fatigue Factor is applied to calculate the fatigue allowance.
Important
For an added fatigue factor to be applied to calculate a given activity’s fatigue allowance, ensure that a shift is applied to the labor user’s activity record. Otherwise, the Default Fatigue Factor is applied to calculate the fatigue allowance.
Steps#
Open the Rebus menu, and go to Admin Tools > Labor > Activity Configuration Admin.
From the Existing Activity tool panel, find the activity type for which to add another fatigue factor, and select it.
Go to the Fatigue tab.
Add another Fatigue Factor and its Fatigue Range. Follow these steps:
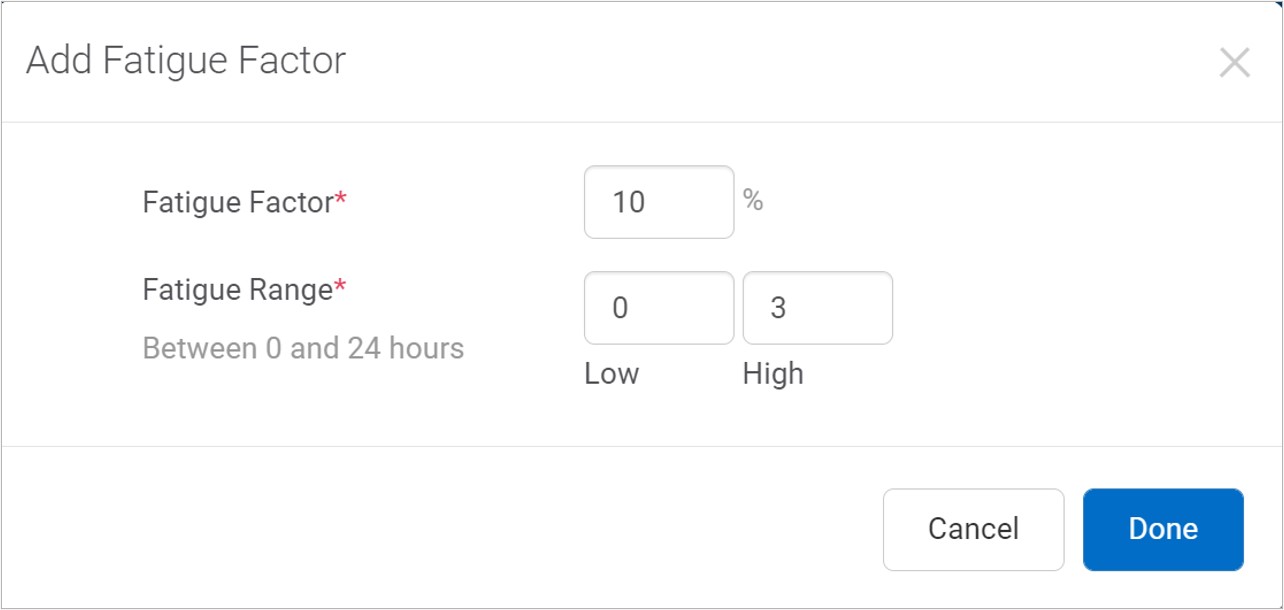
Click ‘Add Fatigue Factor’. The Add Fatigue Factor form appears.
Fill in the fields explained in the table below.
Field
What You Enter…
Fatigue Factor
The fatigue factor’s percentage.
Fatigue Range
The range of hours worked.
Click ‘Done’.
Click ‘Update’. You’ve added a Fatigue Factor with its Fatigue Range.
Travel Time Matrix Improvements#
The travel time matrix functionality has been improved in the following ways:
More Operators for Attribute Mappings and Time Components#
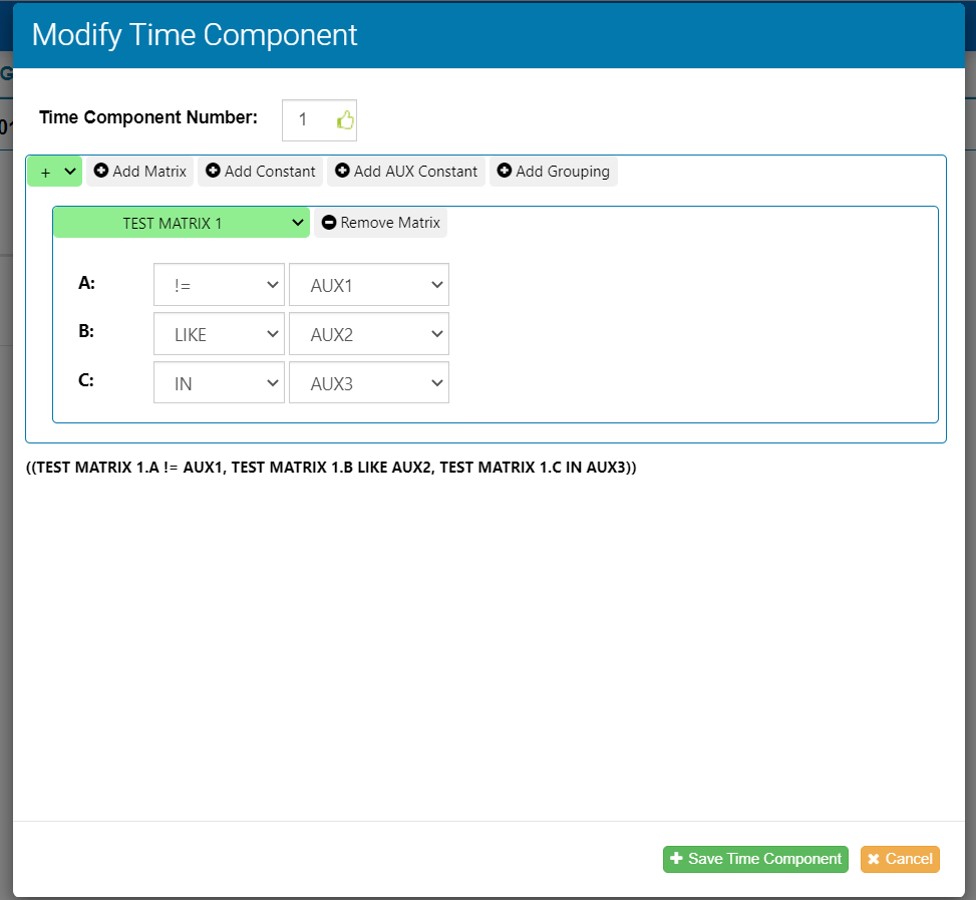
When mapping an attribute mapping to an activity group or a matrix to a time component, you can now use the following operators:
Operator |
What it Means… |
|---|---|
= |
Matches if AUX field value equals vector value. |
!= |
Matches if AUX field value does not equal vector value. |
In |
Effectively works the same as ‘=’. |
Not In |
Effectively works the same as ‘!=’. |
Like |
Matches if there’s any text in the AUX field value that’s the same as the Vector value. |
Not Like |
Matches if there’s no text in the AUX field value that’s the same as the Vector value. |
< |
Matches if the Vector field value is less than the AUX field value. |
<= |
Matches if the Vector field value is less than or equal to the AUX field value. |
> |
Matches if the Vector field value is greater than the AUX field value. |
>= |
Matches if the Vector field value is greater than or equal to the AUX field value. |
These new operators let you build more complex mappings that account for different situations. For example, if you want to create a mapping for any AUX value that has the text ‘DOCK’ in it (e.g., DOCK1, DOCK2, DOCK_SOUTH etc), you just have to create a single mapping using the LIKE operator to cover all possibilities. Previously, you would have had to create a mapping for each possible value.
Previously, equality (=) was the only relationship available for setting up an attribute mapping or adding a time component. There was no ability to select any other relationship.
An attribute mapping specifies not only the attribute matrix, but also the values used to look up a particular attribute in an attribute matrix. An attribute matrix’s rows resolve to strings (a.k.a. ‘attributes’) instead of time values. It works in the same way as a numeric matrix, except that it is used to look up a location.
For each vector in the attribute matrix, you now select an auxiliary field from the imported transactions and one of the operators. The auxiliary field values and the relationships specified by the operators are used to look up a matching row in the attribute matrix. The attribute from the matching row (e.g., ‘ZONE2’) is assigned as the value of the auxiliary field selected in Main Aux.
Similarly, when mapping a matrix to a time component, you now select an auxiliary field from the imported transactions and one of the operators. The auxiliary field values and the relationships specified by the operators are used to look up a matching row in a numeric matrix, which resolves to a time value.
The Rebus Labor module’s matrix configuration functionality can calculate an extra time value for each activity. Usually, this functionality is used to calculate the expected travel time of the labor user performing the activity.
Note on Data Types#
An AUX value is stored as a string even when it’s a number (e.g., 45 is stored as “45” in the database). When the AUX value is a number in string format, Rebus converts it to a number for the purposes of finding matches. For the comparison operators (>,>=,<=,<), however, if the AUX value is not a number in string format (for example, “LOCATION”), then the conversion will fail and Rebus will quarantine the transaction. When looking for matches with AUX values, Rebus does not consider case. E.g., the string “DOCK” will be considered a match with “dock” or “Dock”.
Copying Time Component Mapping to another Activity Type#
You can now copy time components from one activity type to another. A ‘Copy Time Component’ button has been added to the Time Components tab of the Activity Configuration Admin screen. This functionality allows you to map time components more easily to activity types.
Copying validations#
When copying time components, you are automatically prevented from doing the following:
Overwriting an existing time component mapping in the target activity type. When copying a time component, you specify time component number (either 1,2, or 3).
Adding to an activity type more than the maximum number of mappings to time components.
Copying to the same activity type (so that no duplicates are created) or to a sign-on/sign-off activity (which are not configured for time components).
Go to the Activity Configuration Admin screen. Open the Rebus menu, and go to Admin Tools -> Labor -> Activity Configuration Admin.
From the Existing Activity tool panel, select the System, Facility ID, and find the activity type. You’re at the activity type’s configuration screen.
Click the Time Components tab and locate the time component that you want to copy.
Click the ‘Copy Time Component’ button of the time component that you want to copy. The Copy Time Component to another Activity form appears.
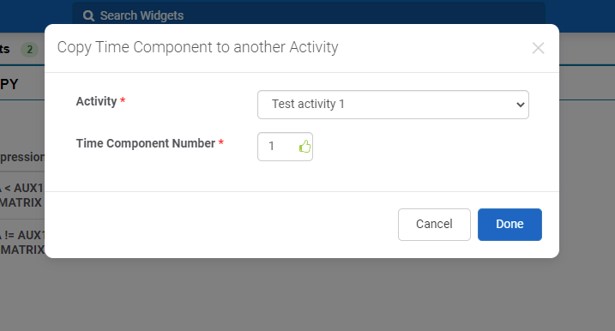
In the form, select the activity type to which you want to copy the time component and select the time component number (1-3).
Click ‘Done’. The time component is copied to its target activity type.
A time component is a subset of the time it takes to complete an activity. Each time component is added to calculate a user’s expected time to complete an activity. Time components are added to activity types in the Activity Configuration screen. A time component maps an activity type to one or more matrices.
Alternate User ID now used in Labor Processing#
Rebus now refers to a labor user’s alternate user id when processing labor transactions. When a labor transaction is imported into Rebus, Rebus now takes the transaction’s user ID and follows the logic below to find a matching labor user record.
First, try to find a match with an alternate user ID. If match found with labor user record, continue with processing, otherwise,
Try to find a match with a user ID. If match found with labor user record, continue with processing, otherwise,
Quarantine transaction.
New validations for Alternate User ID#
A new alternate user ID cannot be the same as an already existing alternate user ID or an existing user ID.
Alternate User IDs are set up on the Labor User Admin screen.
More descriptive error handling for Invalid Time Components#
Rather than showing a generic error message when a Time Component fails, the Transaction Error Review screen now shows which Time Component failed and its Component Name.

Other Improvements#
Updates to Grid Chart Properties#
The below table lists the properties that have been updated with new terms, and a description of each updated property.
Old Property |
Updated property |
Description |
|---|---|---|
columDef > cellStyle > background-color |
columDef > cellStyle > backgroundColor |
Lets you choose a custom color using HEX and RGB codes. Previously, there was drop-down list of limited colors to choose from. |
columDef > cellStyle > text-align |
columDef > cellStyle > textAlign |
Specifies the horizontal alignment of the cell’s text of a column. |
columDef > cellStyle > text-family |
columDef > cellStyle > fontFamily |
Specifies the font family for the cell’s text of a column. |
columDef > cellStyle > font-size |
columDef > cellStyle > fontSize |
Specifies the font size for the cell of a column. |
Removed Grid Chart Properties#
The following properties have been deprecated and have now been removed and replaced with updated properties. The table also describes each updated property.
The update is done seamlessly to all your Grid widgets.
Deprecated Property |
Updated property |
Description |
|---|---|---|
showToolPanel |
sideBar |
|
columnDef > suppressResize |
defaultColDef > resizable |
Whether the columns should be resizable. |
enableColResize |
defaultColDef > resizable |
Whether the columns should be resizable. |
defaultColDef > suppressResize |
defaultColDef > resizable |
Whether the columns should be resizable. |
enableSorting |
defaultColDef > sortable |
Whether the columns should be sortable. |
defaultColDef > suppressSorting |
defaultColDef > sortable |
Whether the columns should be sortable. |
columnDef > suppressSorting |
defaultColDef > sortable |
Whether the columns should be sortable. |
floatingFilter |
defaultColDef > floatingFilter |
Whether floating filters should be displayed and enabled for the columns. |
enableFilter |
defaultColDef > filter |
Whether filters should be enabled. |
columnDef > suppressToolPanel |
columnDef > suppressColumnsToolPanel |
If selected, disables the ability to move columns in the grid to change their order. |
groupRowInnerRenderer |
groupRowRendererParam > innerRendererParamsWidgetFunction |
Specifies a function that overrides the rendering of groups but does not affect the outside properties of the renderer (expand, collapse, etc.). |
