Favorite Widgets#
The Favorite Widgets screen is the first screen you see when you login.
It has the following functional areas:
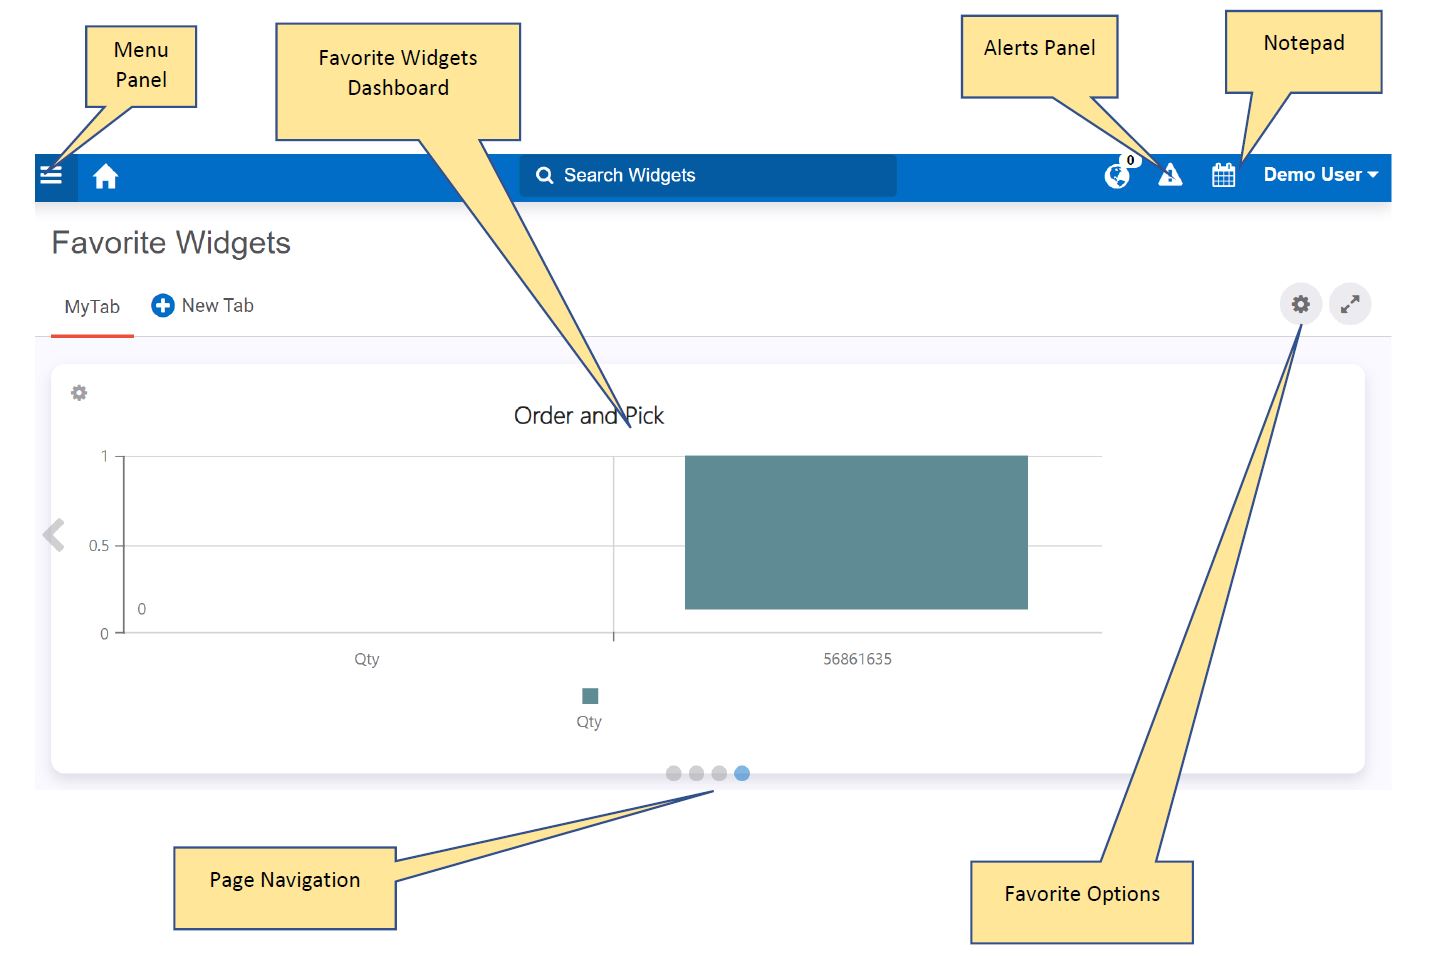
Favorite Widgets Dashboard#
The Favorite Widgets dashboard shows you the widgets you’ve designated as your ‘favorites’. The area is organized into tabs, each of which can hold up to nine widgets.
For more on setting up the Favorite Widgets dashboard, see Adding Widgets and Tabs to Favorites
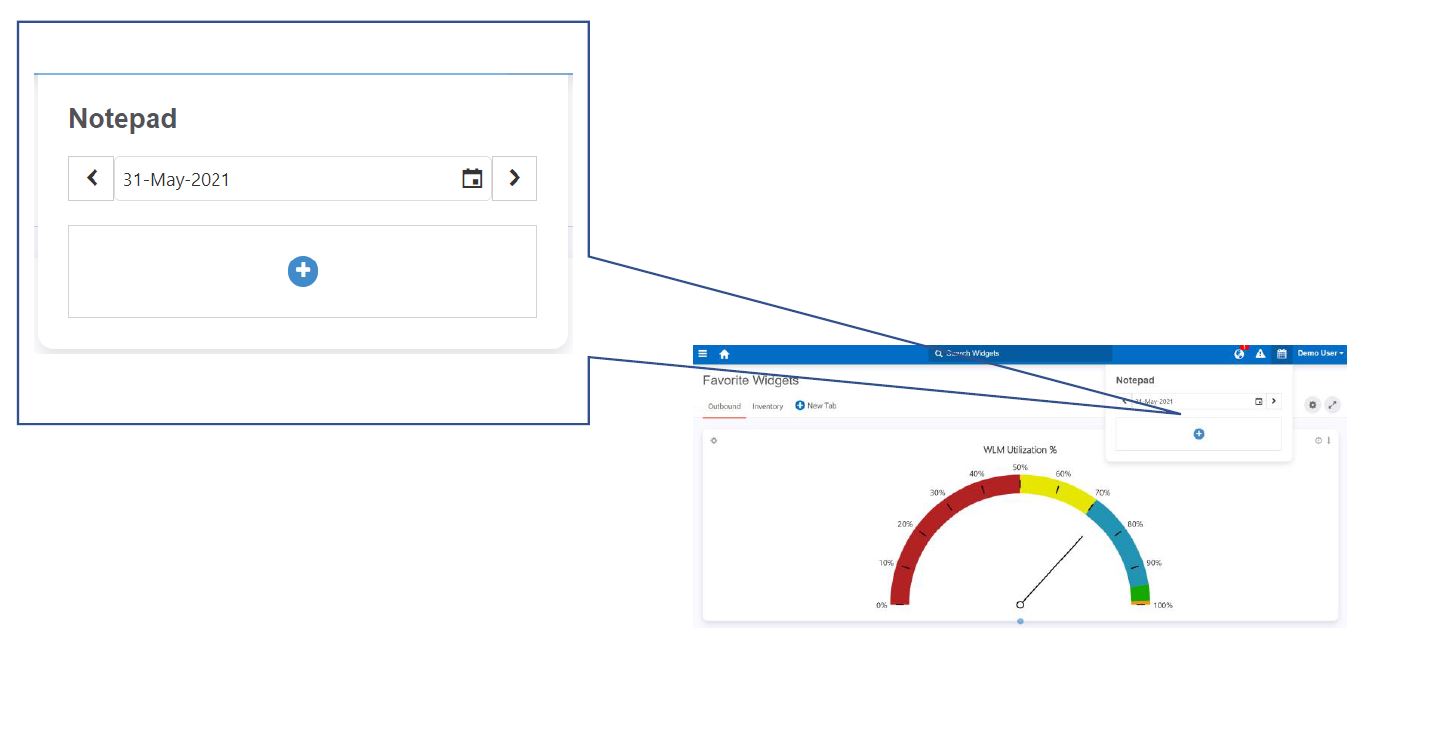
Notepad#
The Notepad lets you add notes for personal use and send notes to other users in the system. You can also find out if recipients have acknowledged the notes.
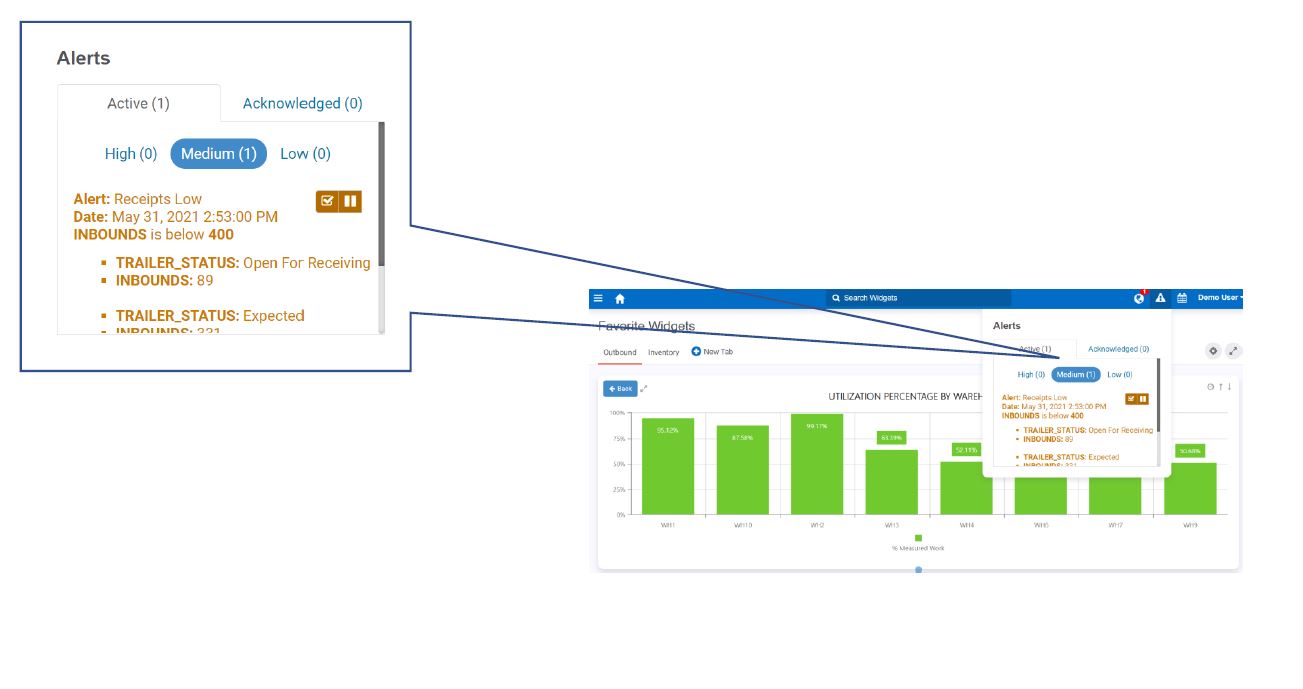
Alerts#
When one of your configured alerts has been triggered, the Alerts section shows a notification. There’s a tab for each of the three priority levels.
For more on setting up alerts, see Alerts.
Adding Widgets and Tabs to Favorites#
To add widgets to the Favorite Widgets screen, you must also at the same time create a new favorites tab to hold them. A tab can hold up to nine widgets. You can have up to seven tabs.
Steps#
Start the widget selection wizard.
The Favorite Widgets Screen is Empty… |
The Favorite Widgets Screen has existing tabs… |
|---|---|
Click ‘Add Widgets’. |
Click ‘New Tab’. |
The first form of the widget selection wizard appears. It shows a list of widget categories represented by grey rectangles. To filter the list by widget name, type the widget name in ‘Search Widgets’ text box. To filter by modified date, select a time range option from the Modified Date drop-down box.
For each widget that you want to add to the new tab, do the following:
Select the widget category of the widget you want to put on the home screen. Thumbnails of the widgets in the selected category appear under the widget category label.
Click the widget that you want to add to the new tab. A green checkmark denotes the selected widget. The name of the selected widget also appears under the ‘Selected widgets’ label.
When you are finished selecting widgets, click ‘Next’. A Widget Properties form appears. It is populated with the default title and parameter values of the last selected widget. The wizard will cycle through the Widget Properties form of each of the selected widgets.
For each selected widget, do the following:
Set its title and parameter values.
Click ‘Next’. The wizard shows the widget properties of the next selected widget.
In the Enter Tab Name field, enter the name of the tab that will hold the selected widgets.
Click ‘Next’. You are at the Favorite Widgets screen, which now has the tab you created with the selected widgets.
Adding Widgets to an Existing Favorites Tab#
In the Favorite Widgets screen, you can add widgets to an existing tab.
You can also change the tab’s name.
To add widgets to an existing tab and/or change a tab’s name, follow these steps:
Note
 You can add up to nine widgets in a Favorites tab.
Click the ‘Edit Tab’ button. The widget selection wizard appears.
Add the desired widgets.
Select the widget’s category. Thumbnails of the widgets in the selected category appear under the widget category label.
Click the widget that you want to add to the tab. A green checkmark denotes the selected widget; the name of the selected widget also appears under the ‘Selected widgets’ label.
Click ‘Next’. A Widget Properties form appears. It is populated with the default title and parameter values of the last selected widget. The wizard will cycle through the Widget Properties form of each of the selected widgets.
For each selected widget, do the following:
Set its title and parameter values.
Click ‘Next’. The wizard shows the widget properties of the next selected widget.
Repeat these steps until the Rename your Tab form appears.
In the Rename your Tab, edit the name of the tab.
Click ‘Done’.
You’ve added widgets to your Favorite Widgets’ tab and/or renamed the tab.
Modifying Widgets on Favorite Widgets Screen#
To modify a widget on the home screen, select one of three options in the top left corner of the widget.
Button |
Click this button to… |
Demo |
|---|---|---|
|
Remove the widget. |
|
|
Expand the widget so that it fills the home screen’s main display area. |
|
|
Open the widget properties form and change the widget’s parameter values. |
|


To remove a tab from the Favorite Widgets area, remove all the widgets on it. The tab disappears.
Using the Quickview Feature#
You can see the details of a favorite widget on the Home screen through the Quick View feature. Hover over the Quick View icon in the upper right corner of the widget to view details. You will see:
Description
Auto-refresh rate
Applied parameters, filters, and values
Layer names (for Warehouse Map widgets)
Drill down level (for drill-down widgets)

Moving between Pages#
Each page of a tab is represented by a translucent circle at the bottom of the screen. The current page’s circle is blue. To display another page, click on its grey circle.
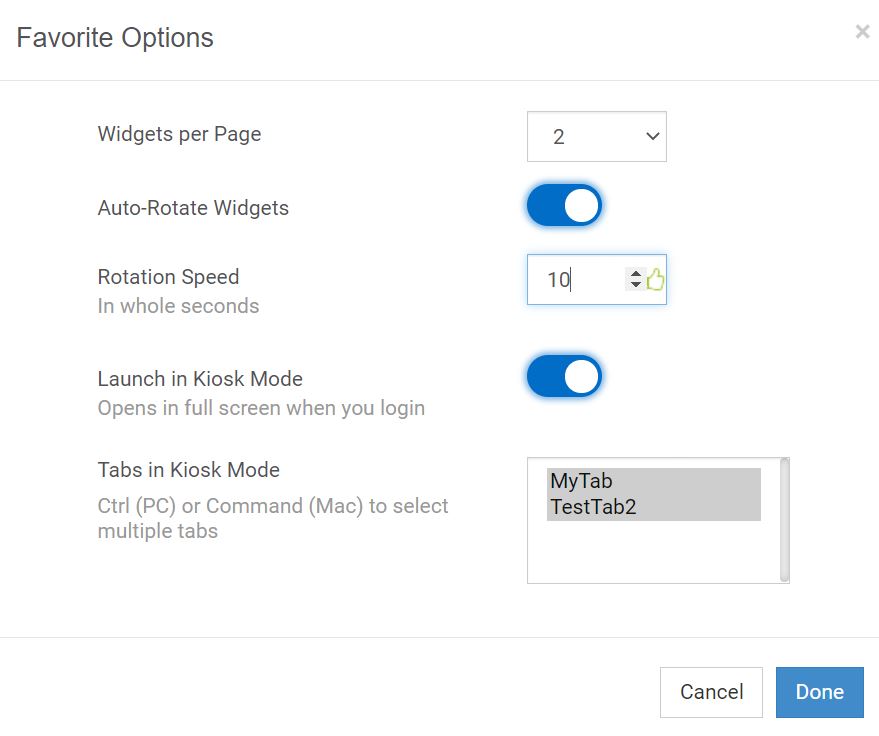
Editing Display Options#
The Favorite Options form lets you decide how widgets are displayed for all tabs. To open the Favorite Options form, click the cogwheel button  in the upper right. Through this form, you can determine the following:
How many widgets should be displayed on each page.
Whether Rebus should automatically cycle (i.e., auto-rotate) through the tab’s pages and how long it will display each page as it goes through the pages.
Whether the tab should be opened in Kiosk mode (i.e, full screen).
Full Screen Display#
You can set up your account so that the Rebus Favorite Widgets opens in full screen mode (a.k.a kiosk mode) by default when you login:
Click Favorite Options
.Toggle the ‘Launch in Kiosk Mode’ switch to Yes. The Tabs in Kiosk Mode select box opens.
Select the tabs that you want to display in Kiosk mode.
Click ‘Save’.
This functionality let’s you set up a big TV screen that shows a set of widgets showing important metrics. To end the full screen display, expand the options bar in the upper right corner and click the End Full screen button  .
.