Alerts#
This topic goes over how to set up and manage an alert. Alerts can be a great way to stay on top of what’s going on in your operation.
What You Can Use Alerts for#
You can use alerts most effectively if you set them up for time-sensitive items that either:
Require immediate action (e.g., an inventory adjustment that’s a little too high).
Could be a leading indicator of a deeper problem (e.g., Labor performance drops).
You can set up an alert to send notifications by email and Short Message Service (SMS).
Note
 Alerts are not available for grid or pie widgets.
Setting Up Alerts#
Note
Only the user account that set up the alert can modify its details. When a user account is deleted, the alerts that it set up are also deleted.
Pre-requisites#
Before you set up an alert, you should already have the following:
A widget set up that has the metric whose level you want to monitor closely.
A threshold for the metric that would justify sending the alert.
An idea about how serious going above or below that threshold would be.
Note
An alert will go out as soon as its condition and threshold criteria are met in the Rebus database. When an alert goes out is independent of the widget’s refresh rate.
Steps#
Open the dashboard that has the widget whose metric you want to monitor closely and click its settings
 button. A dropdown menu appears.
Select ‘Alerts’. The Alerts Properties dialog appears.
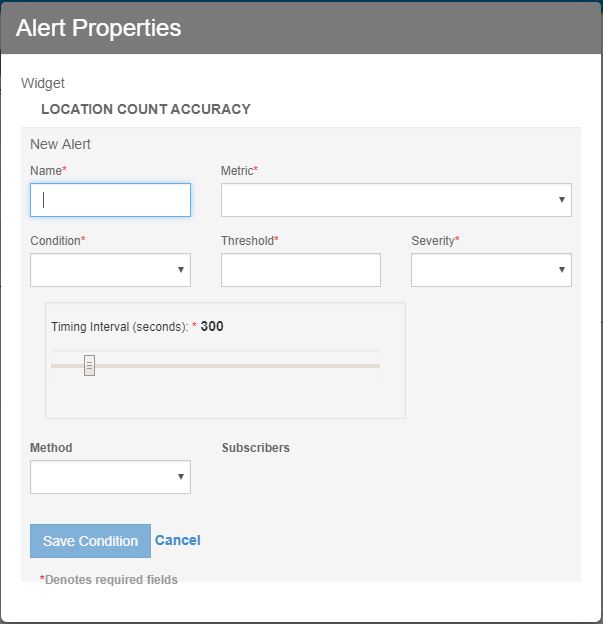
Click ‘New Alert’. The dialog expands to show fields that let you configure an alert.
Fill out the fields.
Field |
What You Enter |
|---|---|
Name |
The identifier for this alert. This value appears in the subject line of the email notification. Give it a name that lets you easily associate it with a KPI so that you can quickly distinguish it from other alerts. |
Metric |
The metric whose value is evaluated by this alert. You can select one of the metrics configured for this widget. |
Condition |
Select whether the alert is triggered whenever the metric goes ‘above’ or ‘below’ the Threshold value. |
Threshold |
The value that triggers an alert whenever the metric passes it. |
Severity |
How serious the alert is when triggered. This value appears in the subject line of the email notification. |
Timing Interval (seconds) |
How often Rebus checks to see if the alert condition is true. The first time the alert condition is met, Rebus will place an alert notification on the Home screen and send an email. If it’s still true at subsequent checks and there’s an existing alert for the same condition, Rebus will make sure the alert is shown on the Active tab and updates the time stamp of the alert on your Home screen. If the issue is still outstanding during the next cycle, another identical alert goes out again. |
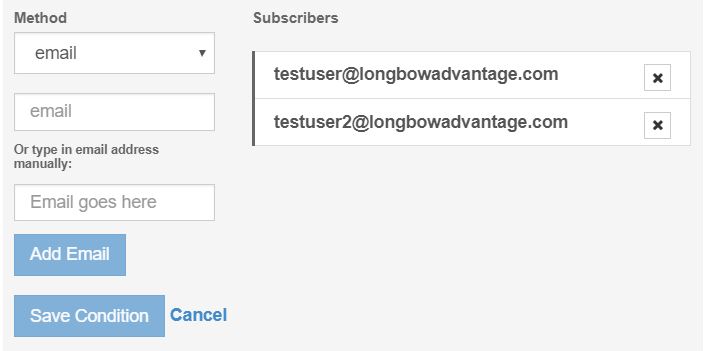
Set up the email and SMS subscriber lists for this notification. If the alert condition is triggered, an alert notification email will be sent to each user in the email subscribers list and an alert notification SMS will be sent to the mobile phone number of each user in the SMS subscribers list. The text of an alert notification SMS matches that of the alert notification email. Only Rebus user accounts can be added to SMS subscriber lists.
Setting up an Email subscriber list… |
Setting up an SMS subscriber list… |
|---|---|
The email address is added to the Email Subscribers list. |
In the Method field, select ‘SMS’. For each user account that you want to add, do the following:
The user account is added to the SMS subscribers list. |
–
Click ‘Save Condition’.
Result#
You have set up an alert. If the alert condition is triggered, an alert notification email will be sent to each user in the email subscribers list and an alert notification SMS will be sent to the mobile phone number of each user in the SMS subscribers list. A notification also appears in the Alerts area of your Home screen.
Editing Alerts#
This task goes over how to edit an alert including removing it or disabling it.
Pre-requisites#
You must be signed in under the user account that set up the alert.
Steps#
Open the dashboard that has the widget where the alert was set up and click its settings
button. A dropdown menu appears.Select ‘Alerts’. The Alerts Properties dialog appears. The dialog shows all the alerts set up for this widget.
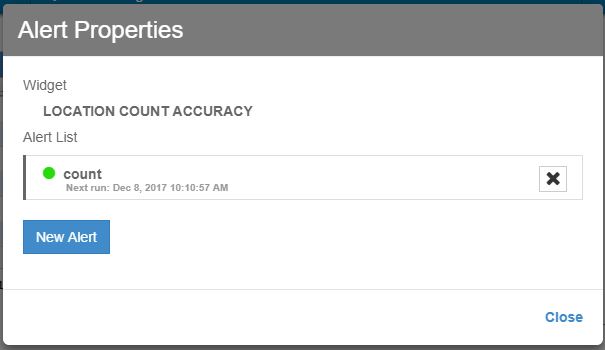
From here you can remove an alert or choose to edit it.
I want to Edit an Alert… |
I want to Remove an Alert… |
|---|---|
Click on the alert label and make your desired changes. To disable/enable the alert, click the ‘Enabled’ toggle. When you’re finished, click ‘Save Condition’. |
Click the ‘x’ of the alert you want to remove and confirm the removal. |
Result#
You have edited the alert.
Managing Alerts on the Home Screen#
Notifications that an alert has been triggered appear in the Alerts area of the home screen.
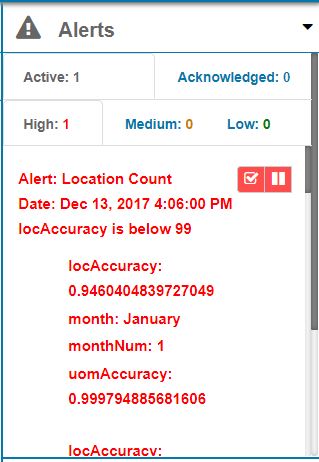
To mark a notification as read, click the checkmark.  The notification moves from the Active tab to the Archive tab.
To pause an alert, click the pause button.  You can decide to pause the alert for a set time or indefinitely, in which case no further notifications will be sent for this alert until the play
  button is clicked.