Release 29.0 Notes 28 November 2021#
Summary#
In this release, we’ve developed the following improvements:
The following processes have been simplified:
Resetting your password and recovering your account.
Creating, editing, and managing users.
Columns on grids are now automatically sized to the widest column value or the column header by default.
You can now apply a filter (i.e., a ‘global’ filter) to all widgets on a dashboard at once instead of having to configure each widget.
You can use auxiliary fields as constants (AUX constants) in time component calculations.
Improvements#
Managing Users and Password Reset Simplified#
The following processes have been simplified:
Resetting your password and recovering your account.
Creating, editing, and managing users.
Creating a New User - Changes#
When creating a new user on the User Information page, you now need to specify only the following details:
email,
alternate ID,
profile,
whether the user signs in with local authentication, and
the isolation groups that the user is assigned to,
Changes to User Information Page#
The following buttons have been added:
A new button below the form, ‘Resend Invite’, lets you re-send the invitation email. This button disappears once the user completes his or her profile.
A new button in the upper right-hand options menu, ‘Export Users’, lets you export all users in a csv file. The file has the first name, last name, email, profile, isolation groups, last modified date, creation date, and authentication type of all users.
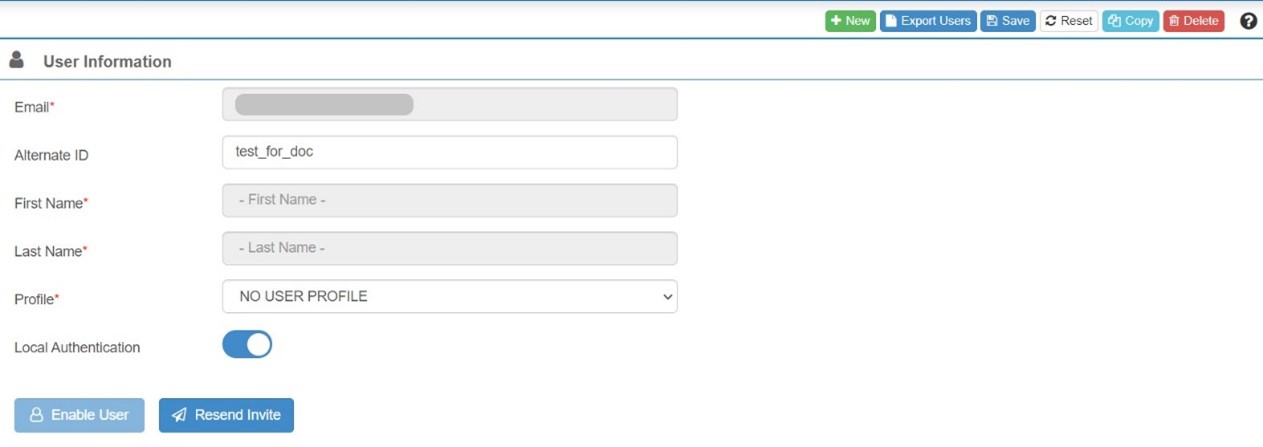
The following fields have been removed:
‘Telephone’ - because there is already a mobile field that can hold the user’s cell phone number.
The security questions section because security questions are no longer needed to re-set a forgotten password.
Configuring a New User - Changes#
If you’re a new user whose account has just been set up in Rebus, you now first receive an email invitation that looks like this:
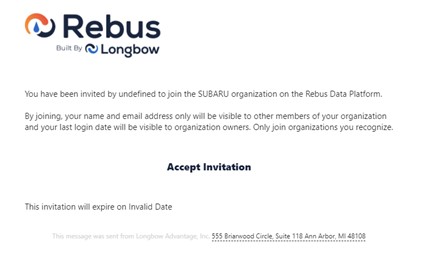
In the email, click ‘Accept Invitation’. You are taken to the following screen:
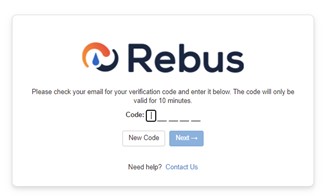
Rebus sends another email to your address with a verification code that expires after 10 minutes.
In the screen that prompts you for a verification code, enter the verification code that was emailed to you. If you can’t find the email, check your spam folder.
Click ‘Next’.
You are a SAML SP user… |
Otherwise |
|---|---|
You are automatically logged into Rebus where you must accept the privacy policy and then configure your profile. |
Continue with the steps below… |
You are at a form where you fill in the details to complete your profile.
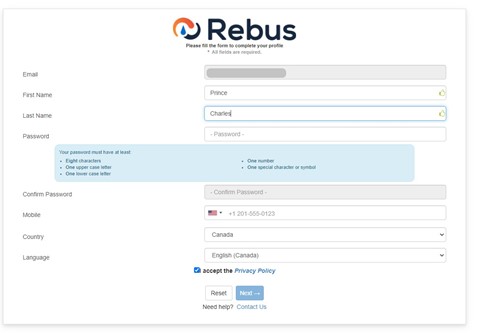
Complete the form by filling in your name, account password, mobile number, country, preferred language, and acceptance of the Rebus Privacy Policy.
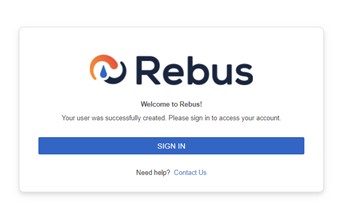
Click ‘Next’. You are taken to a screen that informs you that the account setup process is complete and that prompts you to sign into Rebus.
Forgot Password Process Simplified#
If you click on ‘Forgot Your Password?’ on the login page, you will be prompted to put in your email address, and then you will receive an email with a user code like the one received during sign up. You will then be prompted to create and confirm a new password. The security questions have been removed from the reset password process and the user account setup process.
Applying Filters to All Widgets on a Dashboard#
You can now apply a filter (i.e., a ‘global’ filter) to all widgets on a dashboard at once instead of having to filter each widget individually. You can apply a global filter using any parameter that all the widgets on the dashboard have in common.
A white dashboard title bar has been added under the blue menu bar at the top of the screen.

If the dashboard has widgets, the white title bar will have a Global Filters button at the far right.
Once you apply the global filters, the filter name and its parameters will be visible in the title bar.
Applying Global Filters#
In the title bar, click on the Global Filter
 button. The global filter panel opens. This panel lets you:
add, edit, or remove filters,
search for filters, and
clear all filters.
The panel shows the parameters that can be used as global filters on this dashboard. Only parameters that are common across all widgets on the dashboard can be used as global filters.
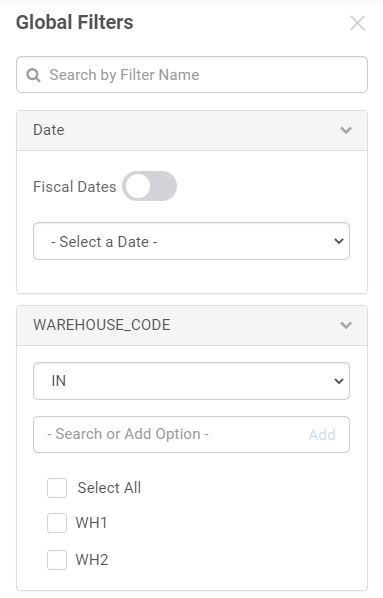
Specify the parameter values by which the widget data will be filtered.
Click ‘Apply’. The widgets now show only the data that matches the specified criteria.
Opting out of Global Filters through the Widget Properties Modal#
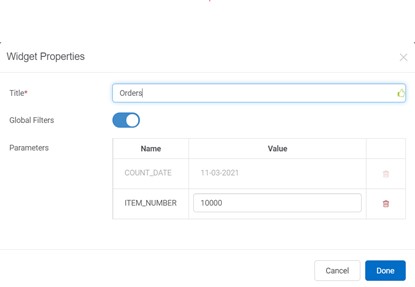
If you don’t want the global filter to apply to a widget, set its Global Filters toggle button to Off. A new Global Filters toggle button appears below the title bar in the Widget Properties form.
After the Global Filters toggle has been set to ‘Off’, a widget’s parameter values can be changed.
Widget Level Changes – Upper Right Corner#
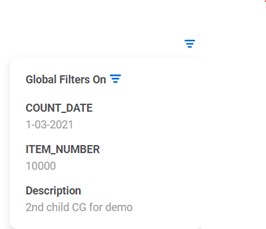
There is now a filter icon at the upper right corner of the widget.
Filter Icon Color |
Meaning |
|---|---|
Blue |
Global filters apply to this widget. |
Grey |
Global filters do not apply to this widget. |
Adding and Removing Widgets to Dashboards that have a Global Filter#
The following table describes what happens if you add a widget to a dashboard with a global filter.
Characteristics of Added Widget… |
Global Filters toggle on Widget set to… |
What happens on Dashboard… |
|---|---|---|
Widget shares all common parameters of dashboard’s global filter. |
On. |
Global filter is applied to the widget. |
Widget does not have all the common parameters of dashboard’s global filter. |
On. |
Global filter is disabled for all widgets on dashboard. NOTE: If you remove the non-matching widget later, the global filters are automatically re-enabled for the remaining widgets. |
Widget shares all common parameters of dashboard’s global filter. |
Off. |
Global filter on dashboard is unaffected and is still applied to all widgets where the Global Filters toggle is set to on. |
Date Ribbon#
If a global date filter is applied to a widget, then the date ribbon will no longer appear at the top when hovering your pointer over the widget. Restricted Dashboards On restricted dashboards, your ability to apply global filters will depend on whether filtering is enabled for that restricted dashboard template.
Columns Sized to Make Widgets More Readable#
Columns on grids are now automatically sized to the widest column value or the column header by default. Previously, you had to manually re-size columns or select the ‘Autosize Columns’ menu option. If you still want to resize the columns manually via the column menu, you can use the new ‘Resize Columns to Fit’ option. Auto-sizing columns are also applied to grids in cascading widgets.
Using Auxiliary Fields as Constants when Calculating Time#
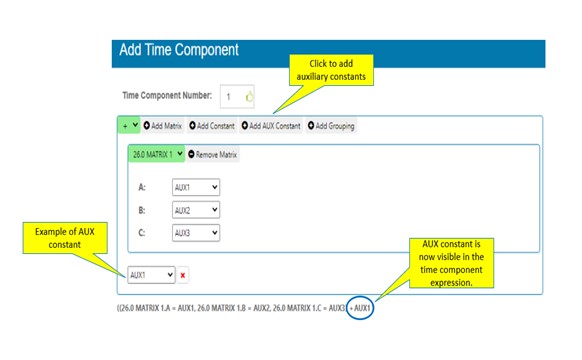
You can now use auxiliary fields as constants (AUX constants) in time component calculations in Rebus’s Labor Module.
Instead of manually adding constants to your time components, you can now have Rebus refer to auxiliary fields. An AUX constant must hold a numerical value, but the value itself doesn’t necessarily have to be constant. For example, if you have multiple tasks whose durations are calculated based on a variable value in an auxiliary field, then you can set it up as an AUX constant and use it as a time component for those tasks.
For example, suppose you have the following auxiliary fields:
AUX1 = 100
AUX2 = BULK
AUX3 = REACH_TRUCK
And suppose you also have the following Matrix A:
A |
B |
C |
Value |
|---|---|---|---|
BULK |
REACH_TRUCK |
60 |
If you have the expression:
AUX1 + (A.A = AUX2, A.B = AUX3),
then your expression will evaluate to
100 + (A.A BULK, A.B = REACH_TRUCK), which is equal to 60+100 = 160.
Constraints#
Time Component constraints must be respected.
AUX constants must be numerical values. Otherwise, the time component will fail, and the transaction will get quarantined.
A time component is a subset of the time it takes to complete an activity. An auxiliary field holds values that Rebus uses to select transactions from the WMS and convert them into activities in the labor module. In time components, Rebus uses auxiliary field values from the transactions to look up the right time values and attributes from the matrices and to calculate the expected time.
Changes to User Interface#
A new button on the Activity Configuration Admin screen, ‘Add AUX Constant’, lets you add AUX constants to a time component.
Bug Fixes#
Dashboard Publisher - Order of widget isn’t being maintained
Node Test Cases - Clean up data when an integration test case crashes
Labor Definition Module - Missing a double quote
