Release 17.0 Notes 08 December 2018#
Summary#
In this release, we’ve added new features and improvements that let you do the following:
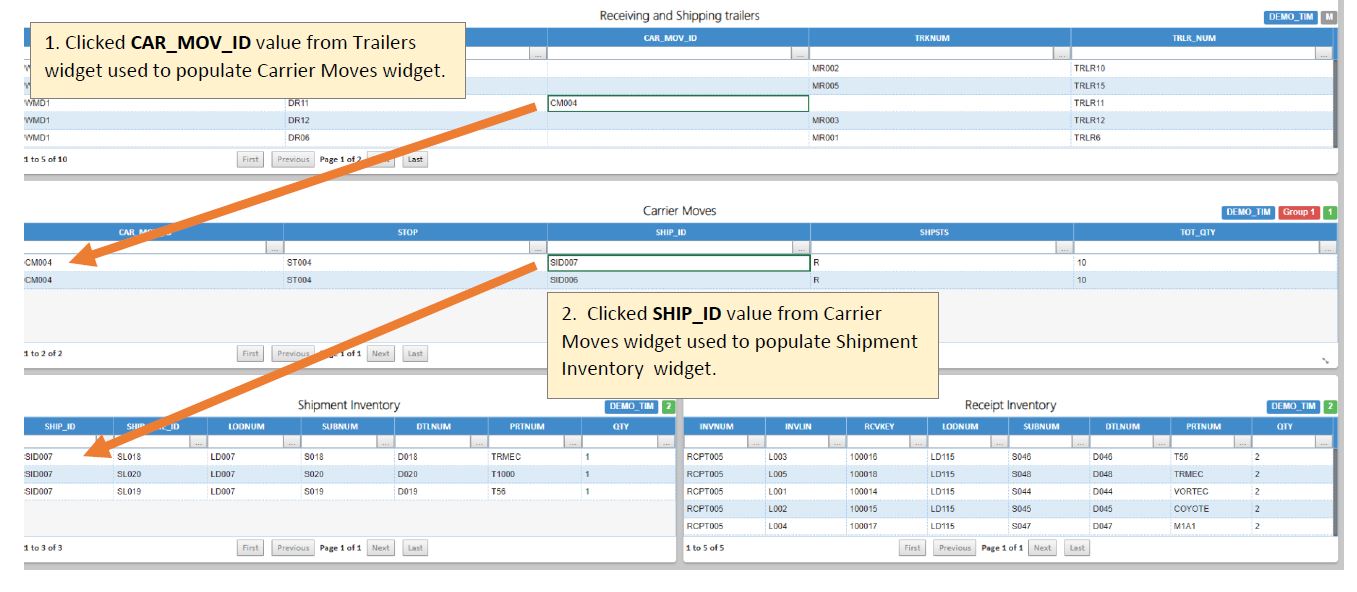
Set up a group of widgets that are linked to a parent widget and that are updated whenever it’s clicked.
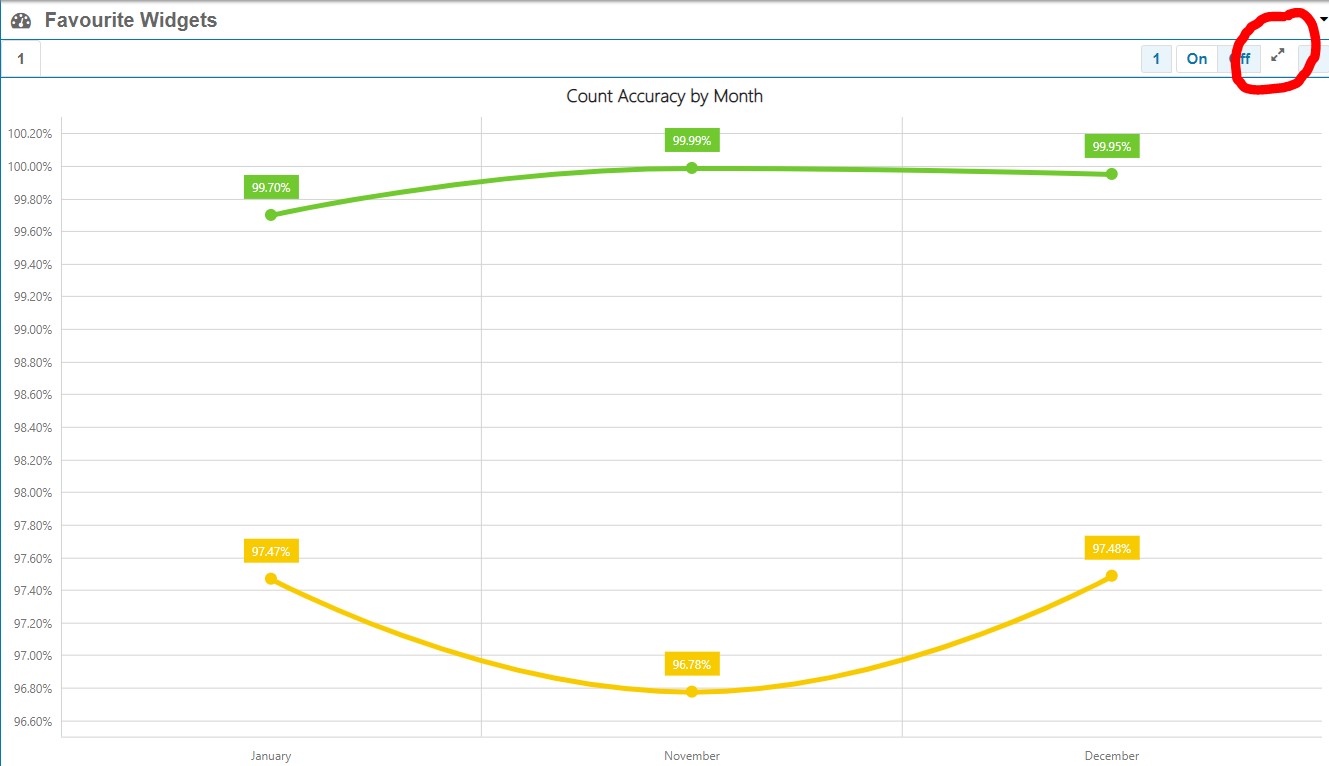
Put the Favorite Widgets area into full screen display mode.
We’ve also enhanced the new Widget Builder functionality in the following ways:
Created a non-guided mode that lets you pick the Widget Builder stages that prepare data for a widget.
Added four new stages that let you do advanced data aggregation.
Enhanced the code editor with color coding and syntax assistance tooltips.
New Features#
Cascading Dashboards#
You can now set up a group of widgets so that each takes parameter values from a parent widget. Setting up a cascading dashboard group lets you change the parameter values of the parent widget and have all the changes cascade to its ‘child’ widgets.
A cascading dashboard group works a lot like a drill down group except that you see all the related widgets at the same time on a dashboard. You can also configure cascading so that only one widget out of a set of widgets in a ‘child group’ is displayed based on which metric is clicked in the parent widget. Widgets in a cascading dashboard group are updated when the parent widget is clicked. For child groups, the dashboard displays the widget in the child group that has the additional parameter that matches the clicked metric.

Configuring Cascading Dashboard Groups#
A new admin screen, Cascading Dashboard Configuration, lets you set up cascading dashboard groups. It works like the Widget Drilldown Admin screen.
Note
 To add the Cascading Dashboard Configuration screen to a profile through Profile Admin, move the ‘integrateddashboard’ option to the profile’s Assigned column on the Maintenance Screen Management tab.
When setting up cascading dashboard groups, keep the following in mind:
Each child widget must have all the parameters of its parent widget although it can have other parameters in addition to these.
A widget in a ‘child group’ must meet both criteria below:
Have all the common parameters of the cascading dashboard group, and
At least one additional parameter that distinguishes it from other widgets in the child group. This additional parameter determines which member of the child group is displayed when a metric on the parent widget is clicked.
Adding Cascading Dashboard Groups to Dashboards#
To add an entire cascaded dashboard group to a dashboard, add the group’s parent to the dashboard. You are prompted to specify whether you want to add just the parent widget or the entire cascading dashboard group. Each widget that’s part of the group has the group label displayed in the top right of the widget.
If you add a child widget to a dashboard and then add its cascading dashboard group, the previously added widget will continue to act like a widget independent of the group.
Full Screen Rolling Dashboards#
You can now set up a full screen display that rotates through a series of widgets. Click the new full screen button on the home screen’s Favorite Widgets area to expand it to fill the whole screen.

You can also set up your account so that the Rebus Home screen opens in full screen (a.k.a. kiosk mode) by default when you login:
Open your account preferences.
Toggle the Kiosk Mode switch to Yes.
Select the number of widgets you want to be displayed per slide.
Click ‘Save’.
To end the full screen display, expand the options bar in the upper right and then click the End Full screen button . This functionality lets you set up a big TV screen that shows a set of widgets showing important metrics.
Enhancements to Widget Builder#
Choose How to Prepare Data for Widget#
When preparing data for widgets through the Widget Builder screen, you are now prompted to decide whether to be led through a sequence of stages (Guided Mode) or through Non-Guided Mode.

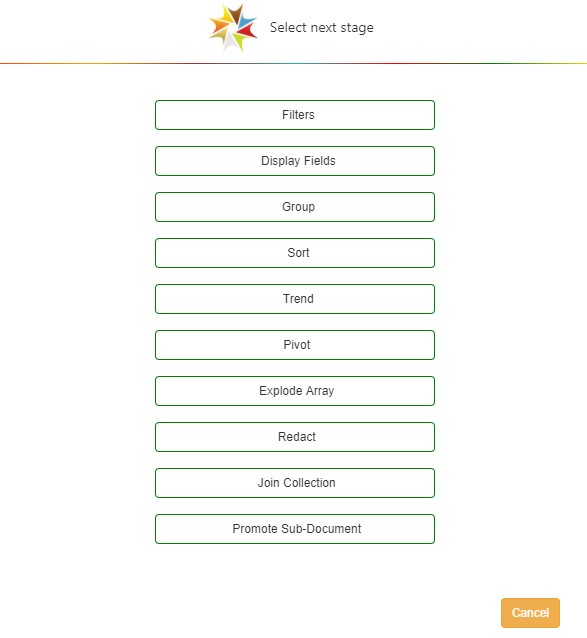
With non-guided mode, you first fill out the Basic Info stage, then decide how the data will be selected (Filter stage) and then you can choose which stages you want to fill out to prepare the widget’s data. After you’ve completed a stage, you are shown a menu of other stages that you can fill out next.

New Widget Builder Stages#
Four new widget builder stages give you more advanced options to prepare data for presentation in a widget:
Stage |
Let’s you do the following… |
|---|---|
Redact |
Exclude from the data set records that match specified criteria. It also let’s you compare values from multiple fields within the same record. |
Join Collection |
Connect the widget’s currently selected data source to another data source based on a common field that can be found in both collections. The records from the connected data source become array objects. To open them, use the Explode Array stage. |
Explode Array |
Take an array and turn each array item into its own record in the data set. |
Promote Sub-Document |
Open a specified object in a new table so that it becomes the data set that populates the widget. |
You can fill out these stages by going to the Widget Builder screen and editing a widget or creating a widget in non-guided mode.
Code Editor More Legible and Helpful#
Color coding and syntax assistance tooltips have been added to the code editor in the Display Field and Grouping stages of the Widget Builder. Field names, function names and data types have their own colors, which make the functions easier to read. Your function syntax is automatically validated and if it doesn’t pass validation, a tooltip will tell you what’s wrong.

Easier to Select Display Fields#
When selecting display fields through the Widget Builder, you can now see the available fields and which ones have already been selected at the same time. The elements of the Field Display stage of the Widget Builder wizard have been rearranged so that the stage resembles the Grouping stage.

Preview Your Data before Moving onto the Next Stage#
A Preview button has been added to Widget Builder wizard stages. The new button lets you refresh the data grid and see how your latest changes affect the composition of the data set.
Widgets Validated upon Activation#
A new validation ensures that a widget has the minimum required setup before it is activated. When you activate a widget on the Widget Builder screen, the system checks that the widget has the following:
A chart type (e.g., grid, pie chart) applied to it,
At least one stage set up aside from the Basic Info (e.g., Filters, Fields), and
The first stage after Basic Info must be the Filters stage.
If the widget fails the validation, then the system will return an error message.
Other Improvements#
Drill Down Passes Down Values from Clicked Item#
Now, when you click a data item (e.g., row or metric) in a widget that’s part of a drill down series, all the parameter values of the clicked item are used in the query that populates the lower-level widget. Previously, parameter values from the drill down series’ top-level widget would have been used in the query to populate the lower level widget instead of the value from the clicked item.
Labor Module - Incomplete Transactions Deleted After Five Days#
A new process in the labor module improves Rebus’s performance by automatically deleting any incomplete transaction that is five working days old. An incomplete transaction is one that couldn’t be converted into an activity in Rebus due to a validation error. Usually, these are two-step transactions that are either missing a step or the two steps don’t match with regard to user or quantity.
Bug Fixes#
Widgets and Widget Builder#
Widget Builder - Can’t scroll down Group Fields list when editing
New Widget Builder - fields disappear if filtered for specific conditions
Undefined Variables in Trending Stage Non-Guided Mode
New Widget Builder - Trending date field getting cleared out after saved
Inconsistent labeling of ‘Days’ option in Date parameter
New Widget Builder - Activate button is enabled for a newly created query
After applying widget on dashboard, date parameter value displayed ‘Last week starts from Undefined’ instead of ‘Last Week of Monday’
Change parameter ‘Cancel’ functionality after applying widget to dashboard
Outlook#
Outlook - Not able to discard or close compose popup after clearing subject text
Outlook - Cannot add widget as attachment
Labor Module#
Shift Admin - Save break button is enabled before filling all mandatory fields
Activity Adjustment - Cancel without Confirmation
Activity Adjustment - Issue while deleting activity immediately after SIGN-ON
Shift Admin - Newly Created Shift is not Selected
Labor User Group - Cancel Button with no Confirmation
Other#
Organization admin - Saved telephone format is not correct
New Tab In Firefox, On clicking open new tab option then User is unable to open module in another tab
Alerts - large email under Subscribers(Email) is appearing outside of text box and value got truncated.
Poll Admin :- Validation errors present after clicking new poll button
Password Reset Button not working