Release 52.1 Notes 05 July 2026#
Summary#
In this release, we’ve developed the following improvements:
The following screens are now located in the Labor Hub’s Setup tab to provide an improved user experience:
Adjustment Note,
Aux Field Alias,
Time Component Alias,
Matrix Configuration
It’s now easier to do the following on the Labor Hub’s History Tab:
Pick dates and edit fields,
Correct AUX field values.
When an activity exceeds the configured max duration threshold, the system now automatically inserts a sign-off transaction at the point the threshold is reached.
Renaming a widget on the dashboard now returns control of your screen to you right away, so you can keep working in Rebus while the name change is processed in the background.
Labor Module Improvements#
Pages moved to Labor Hub’s Setup Tab#
The Adjustment Note, Aux Field Alias and Time Component Alias pages are now located in the Labor Hub under the Setup tab. The new pages are more intuitive, easy to use, and facilitate quick edits to notes and aliases you want to add or change.
Previously, these pages were located on the Dynamic Field Configuration page, which no longer exists.
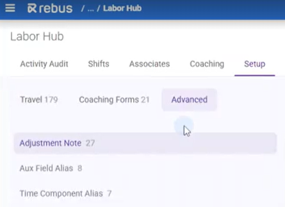
To get to the new pages, navigate to the Rebus menu, then go to Admin Tools > Labor > Labor Hub. Select your system and facility, then navigate to Setup > Advanced. You will see the three pages listed on the lefthand side of the screen.
Adjustment Note Tab#
An adjustment note is a predefined reason you can attach when making an activity adjustment in the Labor module. It explains why time was added, removed, or an activity was inserted/edited (for example, user error, worked through break, missed sign-off).
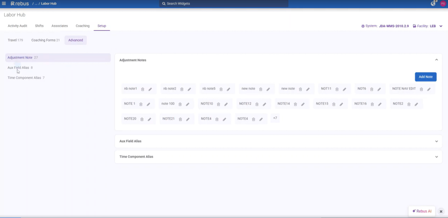
To add an adjustment note, click the Add Note button. A field appears. Write your adjustment note, then click save. A list of similar existing notes will appear as you type, which prevents you from creating duplicate notes.
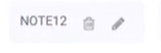
Once a note is saved, you can edit or delete the note directly from the list using the pencil or trash can icon respectively.
Aux Field Alias Tab#
An AUX field alias is a custom label you assign to an AUX field (ex., rename AUX1 to Vehicle Type or AUX2 to Current Location).
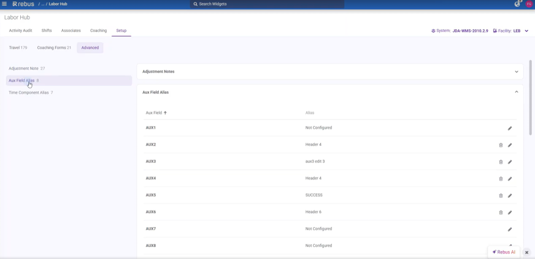
To configure an alias for an AUX field, find your desired AUX field in the list. Click the pencil icon to add or edit an alias. Type directly in the Alias field and click save when you’re done.
Click the trashcan icon to delete an existing alias.
Time Component Alias Tab#
A time component alias is a custom label you assign to a Time Component number so it’s easier to identify what that component represents.
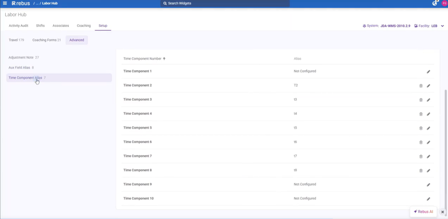
To configure an alias for a Time Component, find your desired Time Component field in the list. Click the pencil icon to add or edit an alias. Type directly in the Alias field and click save when you’re done.
Click the trashcan icon to delete an existing alias.
Matrix Configuration screens moved to Labor Hub’s Setup Tab#
The Matrix Configuration screen is now located in the Labor Hub under the Setup tab. The new page is more intuitive and makes it easier to update and add Matrices.
The old Matrix Configuration screen no longer exists. To access the new screen, navigate to the Rebus menu, and go to Admin Tools > Labor > Labor Hub > Setup > Matrix.
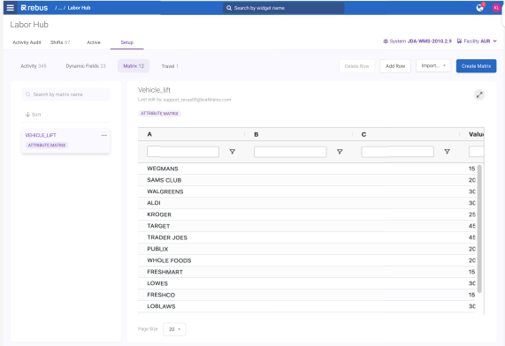
The Matrix screen is where you create, edit, filter, import/export, and manage matrices used to calculate extra time for activities, most commonly travel time. In a Matrix, each row has up to three vectors (A, B, C) that act as coordinates, and a lookup value. Each of these columns can be filtered.
Searching & Managing Existing Matrices#
In the left sidebar of the Matrix page, you can see and search a list of Matrices by name. Attribute Matrices are indicated with a label. You can delete a Matrix directly from this menu using the trash can icon.
To edit an existing Matrix:
Select a Matrix from the list.
Directly edit the data in the cells you want to change, or click Add Row in the Table Actions drawer at the bottom of the screen and add your desired info directly into the table.
Click Save in the Table Actions drawer at the bottom of the screen.
Creating Matrices#
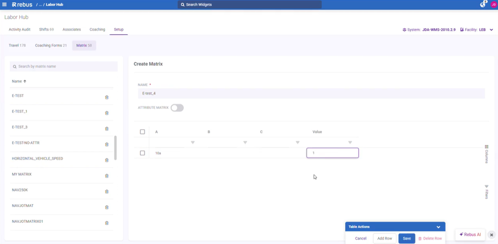
To create a new Matrix, click the Create Matrix button on the top right of the screen.
Enter the name of the Matrix.
Select the toggle to indicate if it’s an Attribute Matrix or not.
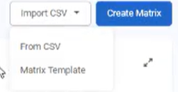
Add your desired values directly in each field of the table. You can also import your values from CSV using the dropdown on the top right of the screen at this stage.
Click the Add Row button in the Table Actions drawer at the bottom of the screen to add a new row.
When you are finished, click Save in the Table Actions drawer.
Matrix Template#
When you import Matrices by CSV using the dropdown, there is an option to download a Matrix Template. This downloads a blank .csv file with column headers A, B, C, and Value so you can fill it in and re-import via the From CSV dropdown. This ensures your .csv file is properly formatted for import.
Exporting#
You can export your currently selected grid using the Export As dropdown at the top right of the screen. You can export the grid to CSV or Excel.
Easier to Pick Dates and Edit Fields on History Tab#
There are several improvements to the History tab in the Labor Hub that make it easier to use.
Grid Refresh#
You can now reload data on the Activity Audit > History grid using a new refresh button located on the top right action bar.

Previously, the only workaround to refresh the Activity Audit grid was to open the date picker and click OK again, which was inconvenient.
Additionally, when you click the X next to the date picker, it now refreshes the grid to today’s data.
Mandatory Columns#
In the Activity Audit > History grid, editable fields are now always visible in the grid, so you can see and act on adjustment data without first having to manage column visibility manually. Previously, fields that are editable via inline editing could be hidden by users via the Columns sidebar, which created confusion since these fields are central to the Activity Audit workflow.
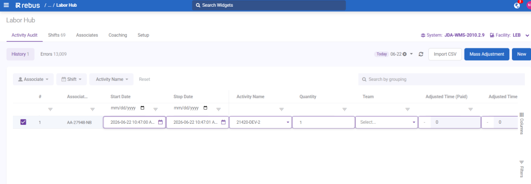
Adjusted Time (Paid), Adjusted Time (Unpaid), Adjustment Note, and Team columns are now mandatory and cannot be removed via the Columns sidebar. All other non-editable columns can still be hidden.
Deselecting Associates#
Clearing or changing your associate selection on the Activity Audit > History screen no longer resets the date range.
Previously, when you expanded the date range beyond the default 3-day window and then deselected an associate or selected all associates, the date range reset back to the 3-day default.
Date Picker#
The calendar modal in the Activity Audit date picker no longer flickers when you switch months or select a longer date range. Previously, the date picker modal visibly blinked or refreshed while you interacted with it, which made the picker difficult to use.
Manually Correcting AUX field values in History Tab#
You can now correct AUX field values directly from Labor Hub’s History tab.
If you find a mistake in an AUX field (such as TrailerID, OrderID, WorkOrderID, ClientID, etc.) on a recorded activity, you no longer need a separate adjustment process. You can open the activity transaction in Labor Hub’s History tab, edit your desired AUX field, and save your changes from the floating action bar.
For two-step transactions, updating an AUX field on the first step automatically syncs the same value to the second step, so you don’t have to update both manually.
Sign Off Transactions Automatically Inserted#
When an activity exceeds the configured max duration threshold, the system now automatically inserts a sign-off transaction at the point the threshold is reached. This means you will have fewer manual sign-off corrections after max duration events.
Previously, the system would shorten the over-threshold activity to 1 second and leave the sign-on open, which would cause the associate’s next sign-on to be suppressed and require manual correction.
A new Auto Sign-Off column is added to the grid in the Labor Hub > History screen.
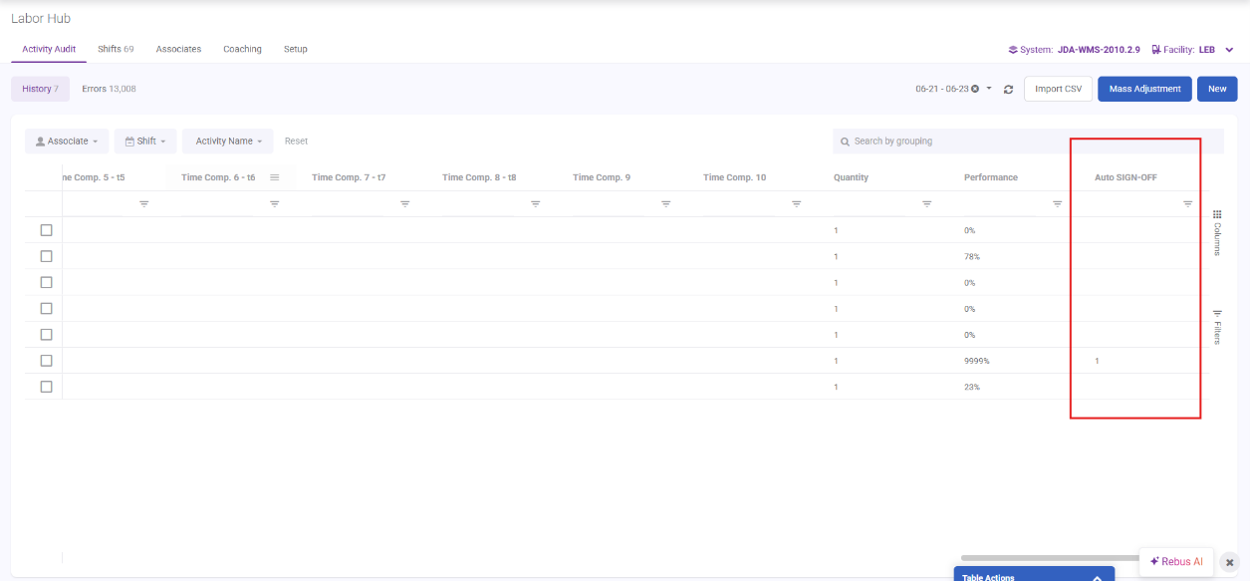
Auto Sign-Off must be enabled by the implementation team and only activates when a max duration value greater than zero is configured. No changes are required for facilities without a max duration set.
Dashboard Improvements#
Screen stays open after Widget renamed#
Renaming a widget on the dashboard now returns control of your screen to you right away, so you can keep working in Rebus while the name change is processed in the background. You’ll receive an email confirming whether the renaming succeeded or failed.
Previously, you had to wait for the rename to finish before you could use the screen again.
Bug Fixes#
Help Center - CSV download links don’t work in Rebus Support Centre
Associate Portal/Android App Not Showing Shift in Progress while Signed in
Labor Hub-Activity Audit-History - Single selected row is not exporting selected row in excel sheet
Widget Builder - Unable to rename widgets - Error updating widget references