Release 52.0 Notes 31 May 2026#
Summary#
In this release, we’ve developed the following new features and improvements:
In the Labor Hub, a new Labor Coaching module lets you create and manage coaching notes for associates.
The Activity Adjustment Admin screen is now located in the Labor Hub as History, under the Activity Audit tab. This update introduces inline editing, which lets you click and edit fields directly.
A new Labor Maps feature in the Labor Hub Setup tab lets you visualize 3D warehouse map data.
Two updates to the Labor Travel page make it easier and more intuitive to use the tools.
Performance % and Utilization % calculations on the Employee Portal mobile app home page now respect your facility’s configured Work Day Start Time.
In the Employee Portal mobile app, associates can now link activities such as Picking or Packing to AUX fields like Order ID, Trailer ID, Work Order ID, Client ID, etc.
Labor Coaching Module - Phase 01 – Managing Coaching Observations#
You can now use the new Labor Coaching module, which makes training and coaching associates through Rebus fast, consistent, and easy to manage through the Labor Hub. Supervisors can now create, edit, and save coaching observations directly in Rebus. The Coaching Module uses configurable questions, AI observations and summaries, and visibility into associate performance metrics to help provide additional context to an associate’s overall performance.
Workflow#
A Supervisor can begin an Observation for a specific associate from the Labor Hub > Coaching screen of the Helpfile. An Observation is a performance evaluation tool and involves a multi-step process, including:
An AI coaching note that describes an associate’s recent performance,
Coaching forms that include questions for both the Supervisor and the Associate,
An observation summary with recommended actions,
An assessment form for both parties to sign and approve.
Access to observations is controlled through profile permissions in Profile Admin, and only users with the new Labor Supervisor permission can access the Coaching screens and observation data gathered about associates. Users with access to Activity Configuration can view and manage Coaching Forms.
Coaching Setup#
To use the Coaching module, you must first set up your personalized coaching forms. These forms can include up to 50 Yes or No questions relating to employee performance. You also have access to a pre-existing template. Suggested questions include:
Did the associate prioritize tasks and follow the work queue?
Were there noticeable delays when changing tasks or assignments?
Was downtime used effectively?
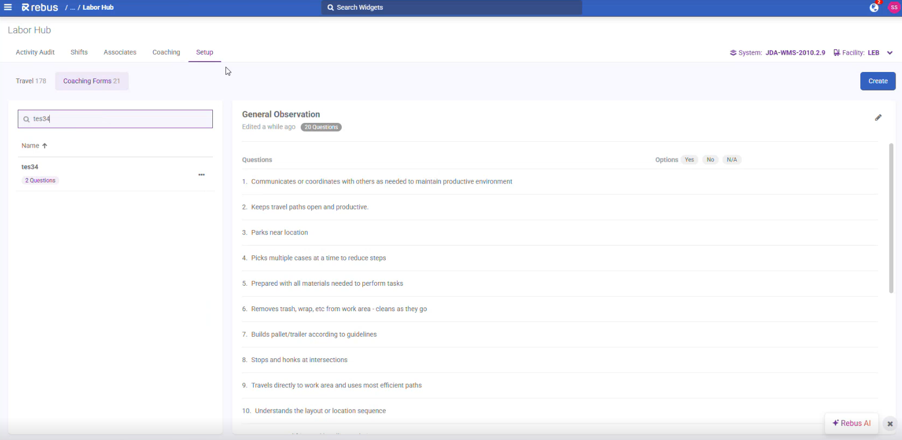
To set up a coaching form:
Go to Admin Tools > Labor > Labor Hub > Setup, and select the Coaching Forms tab.
Click the Create button.
Enter the questions you want included in your form.
Name and save the form. You can now use it in the Coaching module.
Creating Observations#
To create an observation:
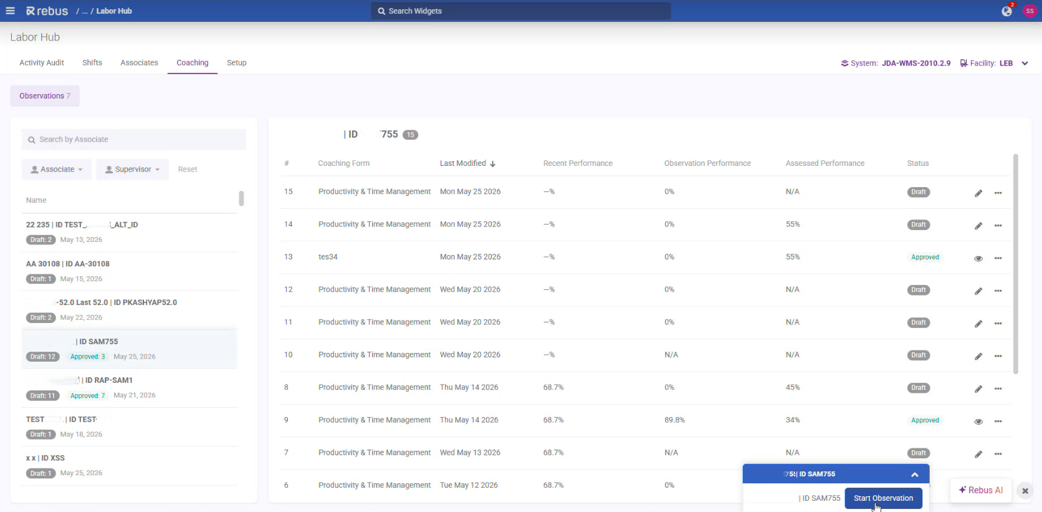
Go to Admin Tools > Labor > Labor Hub > Coaching.
Select an associate to start an observation. The observation panel opens. The panel is divided into five tabs:
Coaching Note
For Observer
Observation Summary
For Associate
Sign agreement
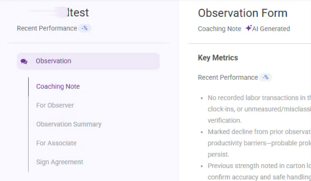
In the Coaching Note tab, you will see an AI generated summary of the Associate’s key performance metrics and a suggested action agenda. You must select your preferred coaching form from the dropdown at the bottom of the screen. The system will suggest a form based on the coaching note above. Once done, click Next.
In the For Observer tab, the Supervisor must fill out the Yes or No questions from the selected coaching form. When done, click Next.
In the Observation Summary tab, you will see AI generated suggested Focus Areas, which give you coaching and observation suggestions based on the submitted questionnaire. Click Next to proceed.
In the For Associate tab, you must have the Associate fill out a generic questionnaire based on their performance. You cannot modify these questions. When this is complete, click Next.
In the Sign Agreement tab, you can see performance metrics for an observation window. You can modify this window to see the difference in metrics. At the bottom of the tab, both the Associate and Observer must sign in order to approve the coaching observation.
Click Approve. Once an Observation is approved, it cannot be edited or removed. You can export results as a .pdf or into Excel.
Labor Module Improvements#
Activity Adjustment Now Under Labor Hub#
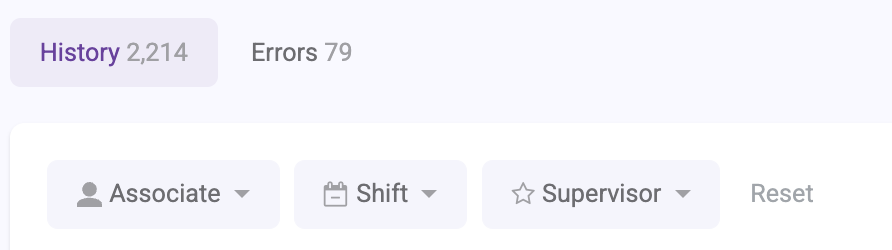
The Activity Adjustment Admin screen is now located in the Labor Hub as History, under the Activity Audit tab. The new History screen is more user friendly and lets you group activities, making it easier to review.
The default grid on the History screen displays the 10 most important columns, and related activities are grouped by Associate ID. There are column filters added directly to the grid for faster filtering. You can filter by Shift, Associate, and Supervisor.
This update includes several additional improvements, including:
Automatically saved grid preferences
Option to reset grid changes
Infinite scroll
Alias text appended to AUX values (AUX1, AUX2, etc.) for improved readability
A new Import CSV button & detailed error messaging for invalid imports
Inline Editing#
This update introduces inline editing to the Activity Audit screen, which lets you click and edit fields directly in the table. To edit a field: 1. Select the row you want to edit. Under the History tab, In the Activity Audit grid, click the checkbox at the far left of the row you want to edit. The row highlights and the status bar at the bottom of the screen confirms “1 event selected.”

2. Scroll to the columns you want to edit. The grid has several columns, and you may have to scroll horizontally to find the field you need. For example, scroll right to reach Activity Name, Quantity, Adjusted Time, or Adjustment Note. Note: Use the Columns button on the far right of the grid to show or hide columns and reduce scrolling.
Edit your desired fields.
Edit Activity Name, if necessary. Click the Activity Name cell of the selected row. A dropdown appears. Select the correct activity type from the list.
Edit Start Date or Stop Date. Click inside the Start Date or Stop Date cell. A date/time picker opens showing a calendar on the left and an analog clock dial on the right. Click the desired date on the calendar, then adjust the hour and minute fields below the clock using the up/down arrows or by typing directly. Select AM or PM, then click OK to confirm. An error icon appears if the value is invalid (e.g., start after stop).
Note
 Click Today at the bottom-left of the date picker to jump to today’s date quickly.
Edit Adjusted Time (Paid / Unpaid). Click the Adjusted Time (Paid) or Adjusted Time (Unpaid) cell. Type a value or use the up/down arrows. Negative values reduce time; positive values add time. The unit is minutes.
Edit Adjustment Note. Click the Adjustment Note cell. A dropdown appears. Select the appropriate reason code for the time adjustment.
Save or discard your changes. When you finish editing, use the action bar at the bottom of the screen. Click ‘Save’ to commit all changes to the selected row, or ‘Reset’ to discard and revert to the original values. You can also click ‘Delete’ from this bar to remove the activity record entirely.
Note
Only one row can be inline edited at a time. If you need to update the same fields across many associates simultaneously, use the Mass Adjustment feature instead.
Mass Adjustments#
To use the Mass Adjustment feature, click the Mass Adjustment button on the top right of the Activity Audit > History screen. A pop out tab appears.
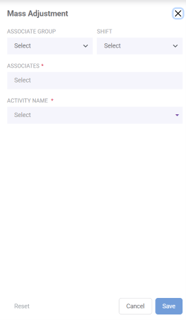
Select the Associate Group and Shift you want to adjust from their respective dropdowns. This is optional.
Select one or more associates from the Associate field dropdown. You can select all.
Select the Activity Name from the Activity Name field dropdown. The Activity description and durations appear.
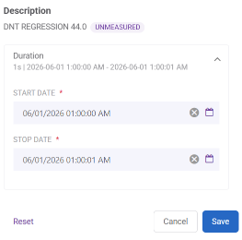
Change the Start and/or Stop date.
When finished, click ‘Save’. This will make a mass adjustment to all selected activities and associates.
Permissions#
The Activity Audit permissions have been simplified and consolidated.
The activityadjustmentmaintenance permission card has been removed from Profile Admin > Maintenance Screen Management.
The laboractivityaudit permission card now controls access to the entire Activity Audit area.
The laboractivityaudit card description has been updated to “Controls access to Labor History and Errors.”
History and Errors are no longer controlled by separate screen permissions. Access is inherited from the parent Activity Audit permission. The updated permissions associated with each of the Labor Hub screens is as follows:
Labor Hub Tab |
Permission |
|---|---|
Activity Audit |
laboractivityaudit |
Shifts |
laborassociates |
Associates |
laborassociates |
Coaching |
laborsupervisor |
Setup |
laborsetup |
Seeing Warehouse Maps in 3D#
There is now a new Labor Maps feature in the Labor Hub Setup tab, which gives you a way to visualize 3D warehouse map data directly within Rebus. Previously, there was no way to visualize warehouse maps in 3 dimensions in Rebus.
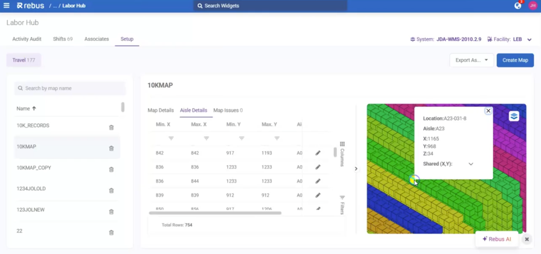
You can now view warehouse aisles and locations in an interactive 3D map alongside the existing travel map configuration tables. The screen includes a resizable splitter, which allows you to adjust or collapse the map view as needed. The map supports panning, rotation, and zoom controls for easier navigation through warehouse layouts.
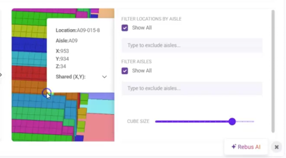
Map objects are color-coded by aisle. Locations inherit the same color grouping. Hovering over aisles or locations highlights the object, and clicking opens a popup with map details such as coordinates, aisle information, and related locations sharing the same position.
A tool panel also allows you to:
Filter aisles and locations shown on the map
Include or exclude specific aisles from view
Adjust the displayed cube size of locations using a slider
Labor Travel - Entering Data when Screen Loads#
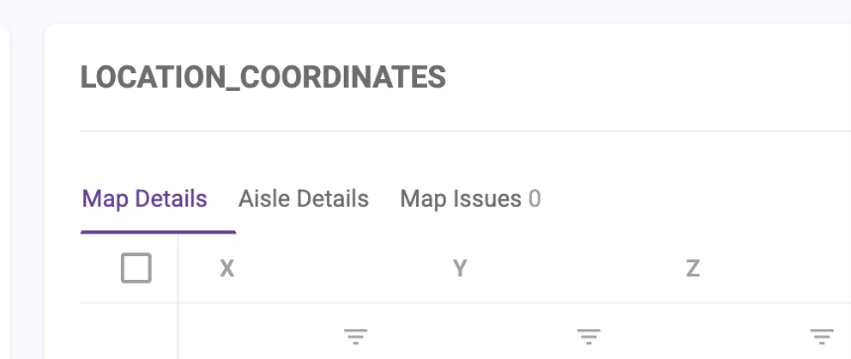
There are two updates to the Labor Travel page that make it easier and more intuitive to use the tools. When the Create Map screen loads, one empty editable row is now present in the grid by default, which means you can start entering data immediately. Previously, you had to first click “Add Row” to add your first set of data.

The “Map Details”, “Aisle Details”, and “Map Issues” tabs are now aligned on the left edge of the table for clarity. Previously, these were centered in the table, which made it more difficult to navigate.
Rebus Employee Portal Mobile App Improvements#
Performance and Utilization calculated based on Work Day#
Performance % and Utilization % calculations on the Employee Portal mobile app home page now respect your facility’s configured Work Day Start Time. Previously, “Today” and “Yesterday” metrics were calculated using a standard midnight-to-midnight calendar day. With this change, facilities that use non-standard operational shifts can now have metrics aligned to their actual work day schedule. When a Work Day Start Time is configured in Organization Admin > Facility Details:
“Today” begins at the configured work day start time
“Yesterday” represents the 24-hour period ending at the current day’s work day start time
If no Work Day Start Time is configured, calculations will continue using the default midnight-to-midnight window.
Mapping Activities to an AUX field#
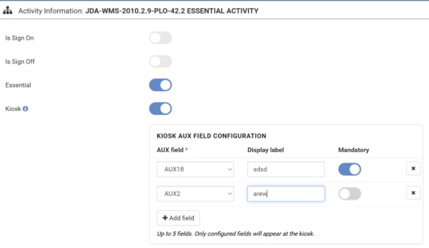
In the Employee Portal mobile app, associates can now link activities such as Picking or Packing to AUX fields like Order ID, Trailer ID, Work Order ID, Client ID, etc. This linking provides better visibility into what activities are being recorded against which AUX fields.
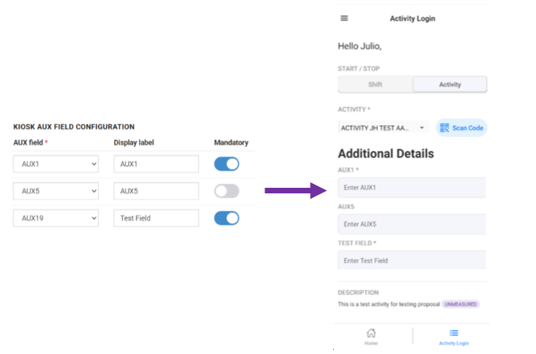
When configured, AUX fields appear in the Employee Portal mobile app during activity transactions. Mandatory fields must be completed before associates can proceed, while optional fields may be left blank. Entered AUX values persist throughout multi-step workflows and are saved for reporting and tracking purposes.
You can configure up to five AUX fields for each activity in the Activity Configuration screen. Display labels are automatically pulled from Dynamic Configuration AUX aliases, with the option to override or create custom labels if needed. AUX fields can also be marked as mandatory.
Bug Fixes#
Labor Errors: Grid date exports are raw/unformatted and time is not preserved and extra blank column exist
User getting console error after refresh the Rebus application page
Filter stage is not populating tag box with list of strings available in joined collection