Release 49.0 Notes 04 January 2026#
Summary#
In this release, we’ve developed the following improvements:
Shift Admin can now be found as a tab called Shifts on the new Labor Hub screen. This update makes creating, managing, and viewing shifts much easier.
The AI Insights function now has an improved interface, which makes it easier and more intuitive to use.
Groupings now display after regular fields in your grid widgets.
It’s easier to see your widgets’ refresh rate, as well as view your widget data while it refreshes.
The Last Modified date and the user who last edited the widget are now displayed in the popover when hovering over a Warehouse Map widget thumbnail.
You can now activate or deactivate a Data Flow directly from the Status column in the Data Flows list on the API Ingestion screen. This makes it easier and faster to change the status of Data Flows.
You can now use the new Rebus AI Agent, which makes it easier for you to find answers to your Rebus Help Center questions without having to manually search through documentation.
You can now filter users by their Profile or Data Controls on the User Management screen. This will make it easier to find users who belong to specific Profiles or Data Controls
Widget and Dashboard Improvements#
Improved Conversation Flow in AI Insights#
The AI Insights function now has an improved interface, which makes it easier and more intuitive to use.
Messages now display only the time and the name of the person who wrote them, making conversations easier to follow. The action buttons are now directly beneath each message for easier access.

You can also now simply scroll up to view older messages and use the new down-arrow button to return to the latest message.
Groupings in Grid Widgets Display Where You Want#
Groupings now display after regular fields in your grid widgets. Previously, groupings always appeared as the first few columns in your grid, which meant you needed to create an extra Display Fields stage just to rearrange columns.
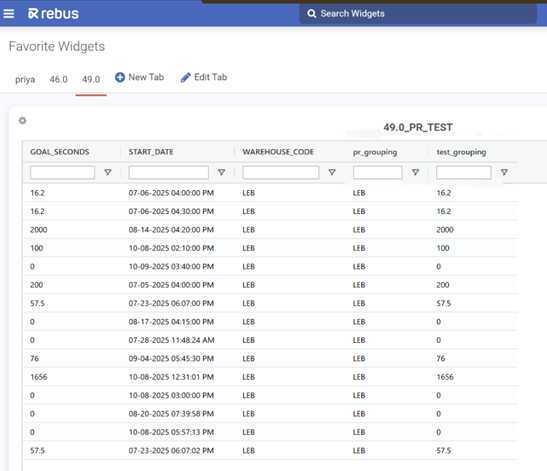
This creates a more intuitive flow to grids, with standard fields (like IDs, names, or categories) appearing before groupings in grid widgets. Groupings are configurations in a grid widget that automatically collect rows with a shared value under an expandable summary row. You can apply multiple grouping levels, allowing the widget to organize its rows like an expandable, multi-level menu.
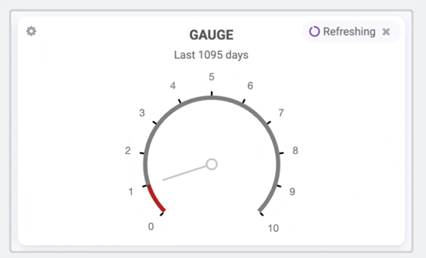
Viewing Widget Data and Refresh rate while Widget Refreshing#
New updates to dashboards make it easier to see your widgets’ refresh rate, as well as view your widget data while it refreshes. While a widget is refreshing, a small spinning icon and the text ‘Refreshing’ appears in the top-right corner. The widget’s data stays visible but won’t be clickable until the refresh is complete. This update does not apply to the Favorites tabs.
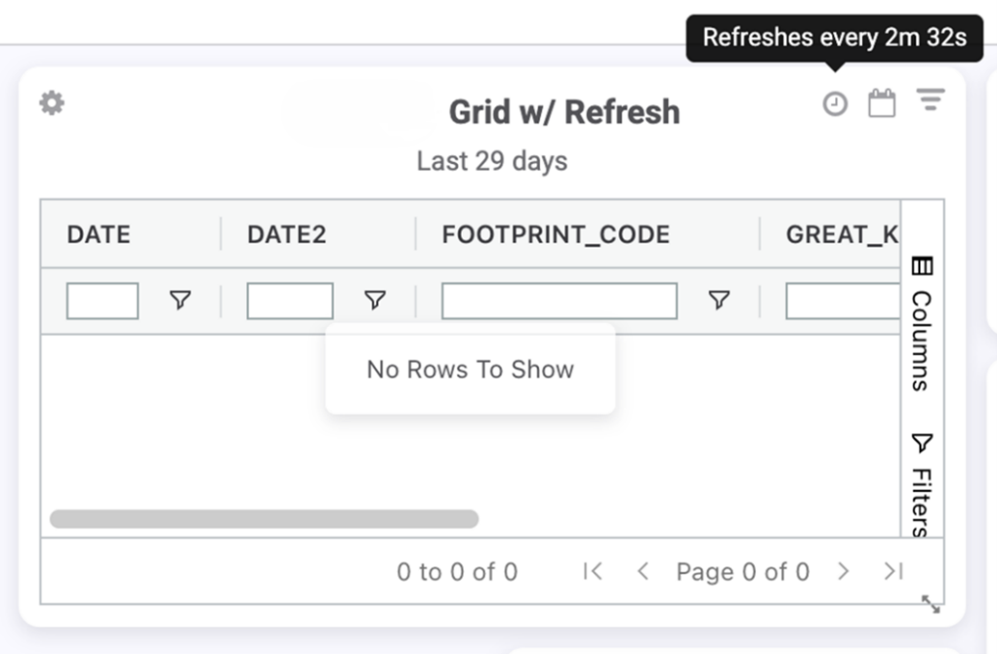
When a widget’s Refresh setting is turned on, you can now hover over the clock icon in the top-right corner of the widget to see how often it refreshes. The tooltip will show the refresh rate; for example, “Refreshes every 5 seconds.”
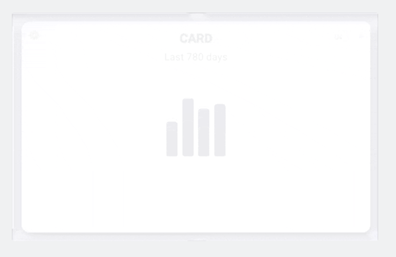
When the Dashboard is first loading, you will see a white overlay.
Warehouse Maps: Viewing by Last Modified Date#
The Last Modified date and the user who last edited the widget are now displayed in the popover when hovering over a Warehouse Map widget thumbnail.
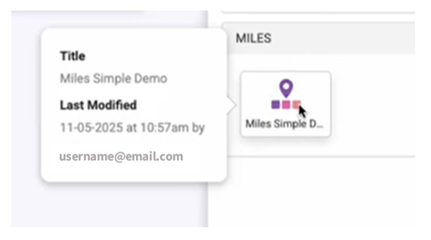
Previously, Warehouse Map widgets in the Widget Library did not display the Last Modified date or modified by user information. As a result, filtering by Last Modified did not function correctly for these widgets.
Labor Module Improvements#
Shifts Admin Moved to Labor Hub screen#
Shift Admin can now be found as a tab called Shifts on the Labor Hub screen. This update makes creating, managing, and viewing shifts much easier. Instead of navigating through multiple pages, all shift creation and editing now happens in a single slide-out panel. This reduces switching between screens and keeps all shift details in one place.
The new Shifts tab replaces the previous Shift Admin screen in the left-side menu.
In the new update, you can now:
Search shifts by associate name or ID, not just by the shift name,
See shifts and their members side-by-side,
See the number of shifts that exist and members belonging to each shift,
View timestamps showing when a shift was last edited,
See shift breaks in the same tab
The new Shifts screen can be found in the Labor Hub, which is a new module in the Rebus menu. The Labor Hub contains both the Shifts tab and the Associates tab. Note that on the Screen Management page in Profile Admin, the old shiftmaintenance card is now called laborshifts.
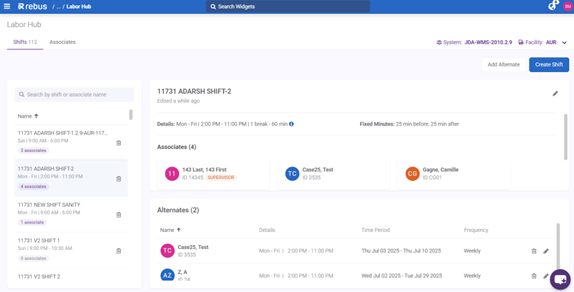
To search shifts by associate name or ID, type your search into the search bar at the top of the lefthand tab. The search returns the Shift Name, Shift ID, and the Associates assigned to that shift by name or ID. This means you no longer need to look up an associate in the Associates screen to see which shift they belong to.
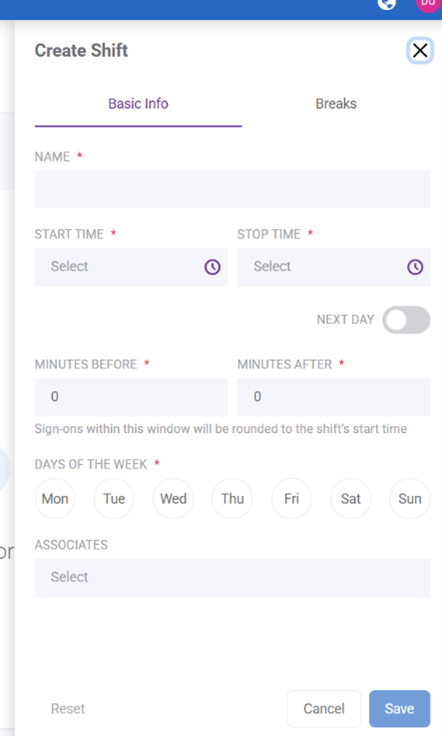
To create a new shift or add an Alternate shift:
Click Create Shift or Add Alternate. Remember that Alternate shifts override primary shifts.
Enter the Basic Info of the shift, including the Name, Start and Stop time, fixed minutes, days of the week, and the Associates belonging to the shift. If you assign an associate who is already assigned to a different shift, the system will now prompt you with a confirmation dialog. When you assign someone to the new shift, it will remove them from their previous one.
For Alternate shifts, fill in the Start and End date, the Repeat Every fields to determine frequency, and the Associates belonging to the Alternate shift.
3. Enter the Break details of the shift in the Breaks tab. This includes the Break Name, a toggle to indicate if the break is paid, Duration Minutes, and Start and Stop time. You can create multiple breaks for one shift. Select the Plus Day toggle to extend the break into the next 24-hour period.
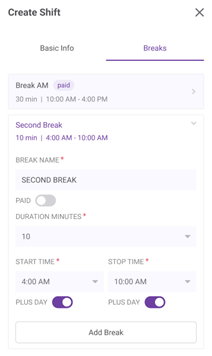
Break details are backward compatible with the prior Break Schedule configuration. When a shift’s break details are opened and saved in the new interface, they are automatically converted to the new break model. The system also now prevents errors by allowing only break times that fall within the shift window and notifying you if two breaks overlap.
To edit a shift:
Click the Edit icon next to the shift you want to edit.
The Edit panel opens. Change the details of the shift.
Click Save.
Shifts that were originally created in the old Shift Admin screen can be opened and edited in the new Shifts tab. When you edit a pre-existing shift, the system automatically updates it to the new shift model. This includes converting the old break configuration into the new break structure as soon as the shift is opened and saved.
To delete a shift:
Click the Delete icon next to the shift you want to delete.
Confirm that you want to delete the shift.
If deleting a shift would result in associates having no shift assignment, the system now warns you before allowing the change.
Admin Screen Improvements#
Easier to Activate API Ingestion Flows#
You can now activate or deactivate a Data Flow directly from the Status column in the Data Flows list on the API Ingestion screen. This makes it easier and faster to change the status of Data Flows.
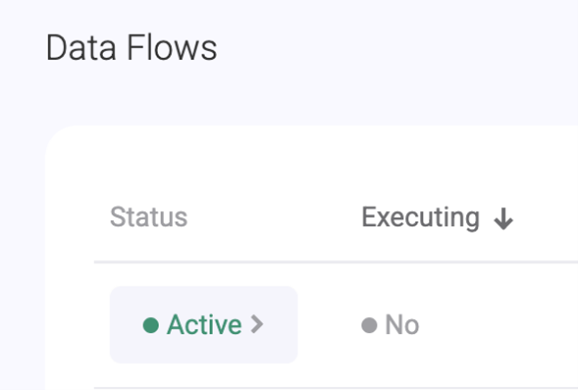
To change the status of a Data Flow, click either the Inactive or Active button under the Status column. If a Data Flow is executing, you will not be able to change its status.
Previously, you had to first click the edit button to open the side panel to change the status of a Data Flow, then save your changes.
Data Flows transfer real-time data from the host system to Rebus. They’re trigger-based actions that populate desired data in Rebus.
Filtering Users by Profile or Data Control Group#
You can now filter users by their Profile or Data Controls on the User Management screen. This will make it easier to find users who belong to specific Profiles or Data Controls, instead of scrolling through the list to find them. You can have multiple selections under each filter.
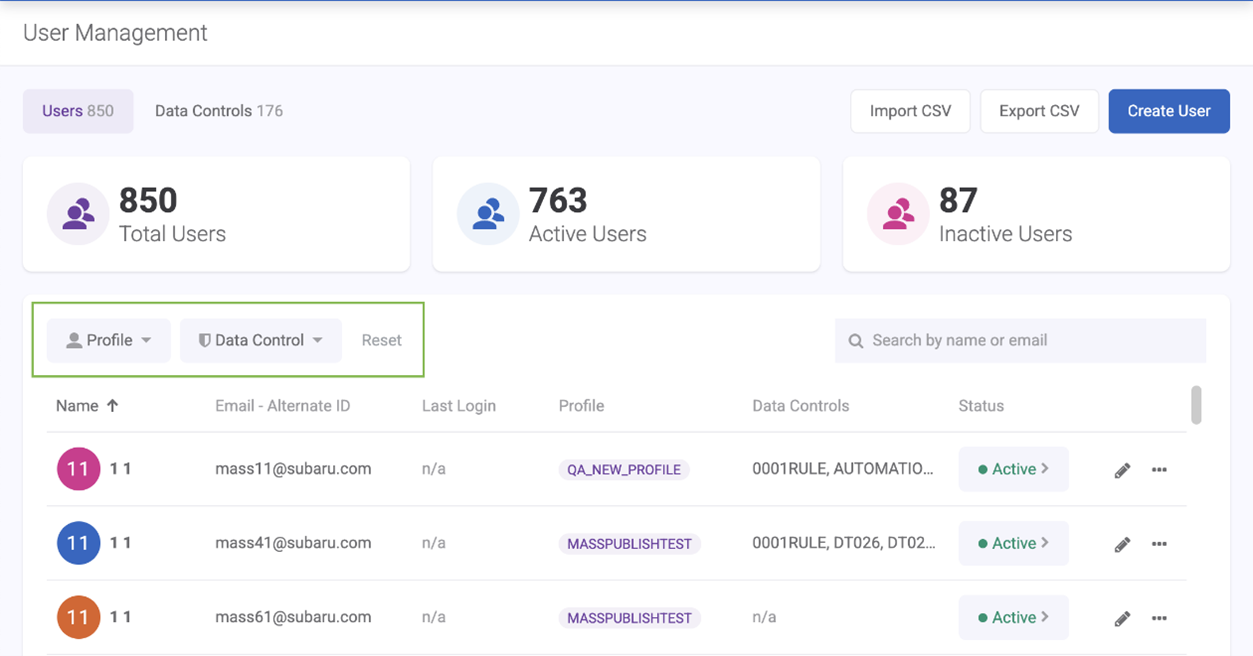
Previously, you could search users only by name or email and could not filter users based on Profile or Data control.
A Profile Determines what screens and widgets a user can access. Each user must be assigned to a user profile.
When viewing widgets on dashboards, members of Data Control can see only the data that the group’s control authorizes them to see regardless of how those widgets are otherwise set up to display data.
Filtering Users by Labor Rules#
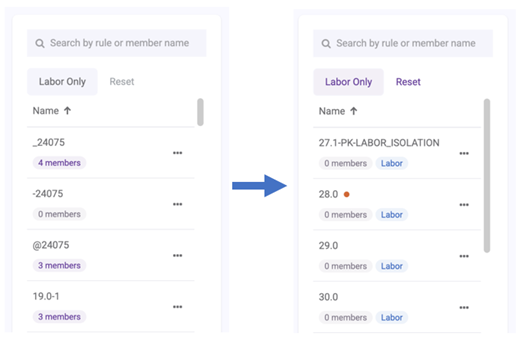
There is now a Labor Only filter option on the User Management screen under the Data Controls tab. This lets you view only Labor rules without manually sorting through all existing rules.
When you click the new Labor Only button, it filters the list to show only rules with the blue Labor badge.
In the Data Controls tab, you can create two different types of rules: Regular and Labor.
Labor access rules restrict what a you can see in dropdowns and lists on Labor Maintenance screens.
Regular data access rules restrict what you can see in the Widget Builder when creating widgets and widgets that have been added to dashboards.
Improvements - Other#
User Assistance AI Agent Searches Rebus Documentation for you#
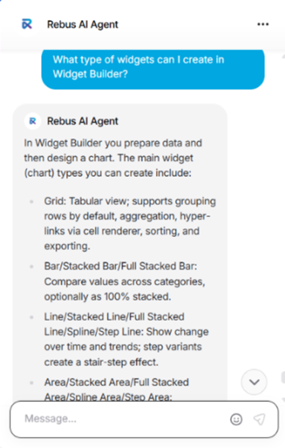
You can now use the new Rebus AI Agent, which makes it easier for you to find answers to your Rebus Help Center questions without having to manually search through documentation.
A chat bubble appears in the lower right-hand corner of every Rebus page, except for the Login screen. When you click the chat bubble, it opens a chat window where you can type questions.
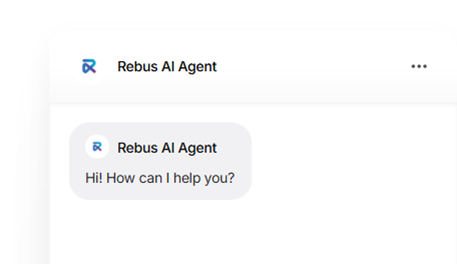
The Rebus AI Chatbot responds with an answer based on Rebus user documentation and clickable links to relevant sections in the Rebus Help Center when applicable. You can ask questions about what functions are available on a screen, how to perform certain procedures, or to define certain concepts.
Bug Fixes#
Dashboards and Widgets#
Global Filters - Duplicate WDR request
Dashboard - Relative Date preview label shows Fiscal Period instead of Days after disabling Fiscal Dates
Dashboard- User gets console error when applying warehouse map widget on dashboard
Dashboard- User gets console error on resizing a warehouse map widget on dashboard
Dashboard- Map overlay icon disappears and user gets console error on switching between layers quickly
WarehouseMapWidgets - User get console error on changing map layers very quickly
Other#
API Ingestion - User gets time out error when api request name is with space at the end
Rebus Top Bar: Avatar initials are not reflected after updating account details via My Account page
Org Admin - SAML - Unable to deactivate SAML config to update
Rebus AI Agent: The new chatbot button in the bottom-right corner is covering the Save button on Rebus pages that use slide-out panels